• Home
  • About Tracy
  • Contact Me

Using Time Wisely

Organized to save money, energy, and time

  • Email
  • Facebook
  • Pinterest
  • RSS
  • Twitter
  • YouTube
  • Document Organization
    • Overview
    • Box 1
      • Credit Report/Cards
        • Credit Reports
          • Credit Updates
          • Credit Scores
        • Credit Cards
      • Personal
      • Home Ownership
      • Vehicles
    • Box 2
      • Life Insurance
      • Major Medical
      • Tax-Favored Programs
      • Prescriptions
      • Dental & Vision
      • Special Health Policies
      • Short-term Disability
      • Long-term Disability
      • Personal Insurance
    • Box 3
      • Social Security Documents
      • Retirement
      • Investments
      • Estate Planning
      • Tax Records
  • Household
    • Cleaning
    • Maintaining
    • Organizing
    • Scheduling
      • Laundry
  • Event Planning
    • Assisting
    • Attending
    • Coordinating
      • Birthday Party
      • Christmas
      • Dinner Party
      • Fall Festival
      • Field Trip
      • Lemonade Stand
      • Thanksgiving
    • Learning
    • Preparing
    • Serving
  • Miscellaneous
    • Communication
      • Customer Service
      • E-mail
      • RSS Feed Reader
    • Goals
    • Organization
    • Time Management
      • To Do List
  • Food
    • Food Prep
    • Grocery Shopping
      • Lists
      • Pricing
    • Menu Planning
    • Recipes
    • Stockpile
  • Family Activities
    • Going Out
      • Free Outings
      • Inexpensive Outings
      • Summer
    • Rewards
      • Good Grades
      • Reading
      • Summer Reading
    • Staying at Home
  • Stretching Your Dollars
    • Daily Deals
      • Groupon
      • LivingSocial
    • Drugstores
      • CVS
    • Gas Prices
    • Gifts
    • On-line Shopping
    • Pictures
    • Products
    • Restaurants
    • School Items
    • Tips
You are here: Home / Archives for Document Organization

Estate Planning Documents Overview

May 5, 2013 by Tracy

InvestmentWe have reached my favorite section of our important document organization – the estate planning documents. This is actually the section where I disagree with Suze Orman.

She is a financial planner, and I appreciate her financial advice. However, estate planning is legal based, and Suze, Love Bug, is not an attorney.

Having worked in the legal field as a legal secretary and then a legal assistant, I learned the value of a great attorney. For our estate planning documents, we hired an attorney. When we purchased our estate planning package, we paid around $600 almost 10 years ago which was worth every cent.

Before we dive into the estate planning section, let me give you a quick review of how far we’ve come, and an overview of where we are going.

Review

For those of you just joining our document organization or those who just need a reminder, we have organized File Box 1 and File Box 2. We are plugging away at the 5 sections of File Box 3. Having covered our Social Security documents, retirement plan documents, and investment documents, let’s turn to estate planning documents.

Overview

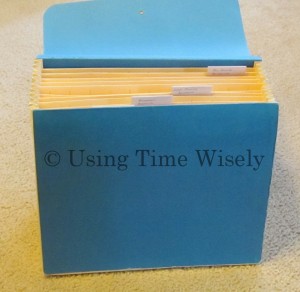
Located within 5 file openings, I keep the following documents in our Estate Planning section:

    • File Opening 1: Checklists
    • File Opening 2: Estate Planning Documents
    • File Opening 3: Copies of Estate Planning Documents
    • File Opening 4: Correspondence
    • File Opening 5: Research

As we cover the contents of each file opening, I will share the choices Paul and I have made. Our situation is different from yours, and a reputable, local attorney can best advise you on your state’s laws and your estate planning options.

If you purchased a Suze Orman Protection Portfolio, please do not use her estate planning documents. The only exception would be if you live in California, but even then, you would want to hire a local attorney to review the documents for you.

Creating these estate planning documents is too important to go the easy, cheap route. You definitely need experience when putting your house in order.

Please do not ignore this section because you do not have $600 to fork over to an attorney. Paul and I saved for almost 2 years before taking the plunge. Knowing what you need and what documents the attorney needs will empower and give you confidence when you seek an attorney.

Next week, we will begin the checklist section of our estate planning documents. Feel free to ask any questions. I will do my best to point you in the right direction, but I am not a legal expert or an attorney. Happy organizing!

Question: How much did you pay for your estate planning documents?

Filed Under: Box 3, Estate Planning, Document Organization Tagged With: File Box 3

2013: First Credit Report Update

March 31, 2013 by Tracy

2012 Credit report update

Photograph Credit: Flickr (Dan Eriksson)

Though you have probably already requested your first credit report this year, I wanted to remind you in case it slipped your mind. Having placed a reminder on my calendar during the Planning for Success series, I requested our credit reports in February.

Staying proactive in reviewing our credit reports alerts us to any unusual activity. Protecting our accounts with protective passwords and credit limits, we hope to deter identity thieves from our accounts.

To check those accounts often, we request one credit report every four months. With one free credit report each year from each of the three credit bureaus, we can monitor our credit all year along without paying a monitoring service.

If you are following my recommended schedule for requesting your credit reports, then check the date on your previous year’s credit report before requesting a new report. Wait at least one full year from the processing of your last request. For example, I requested my TransUnion report on February 20, 2012, so I can request another this year for free anytime after February 20, 2013.

In using time wisely, I request our reports every 4 (or 5) months. During the first quarter of 2013, I requested Paul’s Experian report and my TransUnion report. When the reports arrived, I followed this plan:

1. Review for errors,

2. Challenge discrepancies,

3. Run a free Experian credit score for Paul,

4. Run a free TransUnion credit score for Tracy,

5. Replace last year’s reports with the new reports and credit scores in the first file slot of Box 1 of my important documents, and

6. Put file box away until June’s credit check.

By scheduling our credit report requests on my calendar, I stay on track while checking our reports. Though we have not had any unusual activity, I find reassurance in seeing the same information reported repeatedly. This process only takes a few minutes, but finding an error can save you money, energy, and time. Happy checking!

Question: Do you regularly check your credit reports?

Filed Under: Credit Updates, Credit Reports, Box 1 Tagged With: credit reports

Investment: Closed Bank Account Letters

March 24, 2013 by Tracy

InvestmentFor only having 5 categories in File Box 3, I feel like it is taking so long to progress through this file box which is partly due to the interruptions in December and January. In spite of the delays, we will complete the investment documents category today. 🙂

The following is a recap of the documents housed within the two file openings of our accordion filing box holding our investment documents:

Fourth File Slot

  • U.S. Treasury Savings Bonds
  • Cash accounts – with free printable record
  • Financial accounts for adults
  • Financial accounts for children
  • Beneficiary designations

Fifth File Slot

  • Paid-in-full loan documents
  • Closed bank account letters

Closed Bank Account Letters

When I was organizing our important documents, this category never crossed my mind. In her Protection Portfolio, Suze Orman designates a slot for closed bank accounts.

In thinking through all the financial institutions where I held accounts, I had assumed the accounts were closed when I withdrew all the money. However, I did not have letters confirming those accounts were closed.

Requesting Closed Bank Account Letters

This process took some time as I contacted each financial institution for both Paul and I. Together we had 8 accounts with some of them banks and others credit unions. Then I took the following steps:

1. Located the account numbers for each financial institution (e.g., consulted checks, bank statements, and correspondence),

2. Contacted each financial institution,

3. Verified that our account was closed,

4. Requested a letter stating the account was closed by consumer,

5. Received the letter via mail, fax, or e-mail, and

6. Filed the closed bank account letters within our file box 3.

Obstacles Gaining Closed Bank Account Letters

Though it sounds easy to just contact the company, I did run into these obstacles along way:

1. Account information had been purged from the financial institution

After a few rounds of trying to get a letter, I finally spoke to a vice president at the main branch who sent a letter stating that we no longer had any open accounts and included our social security numbers as the account numbers could not be verified.

2. Needed our request in writing

Upon calling some of our financial institutions, they required our request in writing. I composed a letter and mailed it to the bank or credit union. I chose not to fax as our social security numbers were on the document, and I did not know who had access to the fax machine.

FREEBIE: Should you need to provide a written request, you may use the following sample letter to make your inquiry:

Free printable Bank Account Closing Letter – WORD document format

3. Financial institution had a merger after the account was closed

For these accounts, the current financial institution did not have records from the previous bank. So, they provided a letter indicating the original account numbers from the previous bank and the new account numbers had been closed and, in one case, purged from their system.

4. No records found for the account numbers

One institution could not find any information, so they provided a letter stating that they were unable to locate any records.

Having the verification that all non-used accounts are closed, we know where our money rests. We also have confirmation that our other accounts are closed should an unauthorized transaction take place. The letters provide proof that the financial institution closed our account or has no open accounts with our names or social security numbers.

Weekly Project: Gather your closed bank account letters or contact financial institutions to receive closed bank account letters.

In organizing your important documents, you might find this step time-consuming. As I did not have any of these letters when I started organizing my file, I invested my time calling and writing to get this information. Now, I know that all our accounts are current with no outstanding fees or monies at other banks or credit unions.

This post brings our third category to a close. You have some time to work on this step as I will begin the fourth category in May. For April, I will try another month of themed posts. Look for more details in this Wednesday’s post.

Keep making progress. In using time wisely, your investment of time and energy will let you know exactly where your investments lie. Little by little your filing system is coming together. You are in the homestretch with only two more categories to go. Happy organizing!

Question: Do you typically request a closed bank account letter when changing financial institutions?

Filed Under: Investments, Box 3, Document Organization Tagged With: Investment

Investment: Paid-in-full Loan Documents

March 17, 2013 by Tracy

InvestmentIn our File Box 3, we have filed our Social Security documents and retirement documents.

The third category holds our investment documents housed in file slots four and five of our accordion filing system.

With our U.S. Treasury Savings Bonds, cash accounts, financial accounts for adults, financial accounts for children, and beneficiary designations filed in slot four, I turn to the first set of paperwork placed in the fifth opening – our paid-in-full loan documents.

Paid-in-full Loan Documents

This post is not to address whether or not one should take out a loan. Doing what is best for your family may look different from your ideal.

If you have never taken out a loan, then you can skip this section. Paul and I both had loans which we paid back and keep the records within our filing system.

Education Loans

Paul and I both had education loans. I carried my loans into our marriage from my undergraduate degree as I did not incur any additional loans from my graduate work. Once those two promissory notes were paid, we kept the paid receipts received from the providers.

When Paul needed additional education, we took out a loan with an interest-free payment plan. In paying off the loan early, we did not incur any interest charges. We keep the documents associated with this loan in our file as long as the record remains in our credit file.

Personal Loans

Coming into our marriage, Paul and I both had a personal loan. My grandmother sold me a vehicle when I was in school which I did not need to repay until after college. I began paying her back without interest when I graduated until we paid it in full.

I kept her handwritten receipt. I’m so thankful for this note as my grandmother passed away a little over a year ago. I know I have her handwriting in cards, but this note was an official receipt showcasing her beautiful handwriting.

Paul’s personal loan was from his parents for my engagement and wedding rings which we paid back in one lump sum.

Though I do not need to keep these two personal loan documents, I do. They remind me of our hard work in focusing on our debt and paying back what we borrowed. I still remember the great feeling when we wrote those last checks and became debt free.

Keeping these documents in the order in which we paid, I paperclip them together and place them in the fifth file opening under the third category of investment documents. When money gets tight, I enjoy looking at these documents as a reminder of how God provided during our very lean years.

Weekly Project: Locate and file your paid-in-full loan documents.

Next week, we will complete the investment documents category with closed bank account letters. Keep making progress as you create spaces for your important documents. May you find encouragement as you file your paid-in-full loan documents. Happy organizing!

Question: Do you find encouragement from looking at your paid-in-full loan paperwork?

Filed Under: Box 3, Investments, Document Organization Tagged With: Investment

Investment: Financial Institutions – Part 3 of 3

March 10, 2013 by Tracy

InvestmentThis past week, I brought file box 1 with me to start going through slot by slot checking that all the information is updated and current. Every time I thought I would get a few minutes to work, I ended up needing to address something else. Therefore, I will try again this coming week. 😉

If you are struggling finding time to organize your important documents, take a deep breath as this is a marathon, not a sprint. Keep this task on your radar.

Find a time that works for you. For me, I already spend time twice a month working to pay our bills, file documents, etc. During those times, I work on our important documents.

Just find what works for you. Don’t worry about the past. Just focus on what you can do this week.

Within our investment category, we have looked at U.S. Treasury Savings Bonds, cash accounts, documents for adult accounts, and documents for children’s accounts. For each of our cash accounts, we have a beneficiary designation form on file. Though each financial organization has their own process, of which you might need to ask, designating a beneficiary for each of your accounts protects your investment.

Part 3: Beneficiary Designations

Financial Institution #1

At our preferred financial institution, we designated our beneficiaries when we opened our accounts. The Payable-On-Death Account (POD) In Equal Shares form required the following information:

      • Account number
      • Account Suffix(es) – checking and savings
      • Account owner’s name
      • Account owner’s social security number
      • Primary beneficiary’s name, address, date of birth, social security number, and percentage of beneficiary (You can choose multiple primary beneficiaries, but the total must equal 100%.)
      • Contingent beneficiary’s name, address, date of birth, social security number, and percentage of beneficiary (You can also have multiple contingents – payable only if there is no surviving primary, but the total of the percentages must equal 100%.)
      • Signatures of all account holders

Upon setting up our estate planning documents, I submitted new Payable-On-Death Account (POD) In Equal Shares forms for each of our accounts to keep all the primary and contingent beneficiaries the same.

I keep a copy of those forms for verification. Also, I confirm our current designations annually by making a call and checking on each of our 5 accounts.

Financial Institution #2

For our second financial institution, we had to ask for beneficiary designation information. We were directed to the branch manager to get the proper Payable On Death Agreement which required the following details:

      • Account number
      • Account owner’s name and signature
      • Joint owner(s) name(s) and signature(s)
      • Primary beneficiary’s name, relationship to account holder, address, date of birth, social security number, and telephone number (For this institution, they do not usually authorize contingent beneficiaries. However, I adjusted the form indicating primary and contingent beneficiaries.)

Though I have not changed our beneficiary designations with our second financial institution, I still check annually to confirm that our designations have not been altered.

To protect our investments, we establish beneficiary designations on each of our accounts. Though some institutions automatically setup beneficiaries, you may need to research and ask for your designations.

As you organize your important documents, check for beneficiary designations for your investments. If you don’t find any, then contact your financial institution to inquire about their policy and how to designate your beneficiaries.

You have safeguarded your investments within your financial institution, so make sure those investments are there when you are no longer available. Happy designating!

Question: How does your financial institution handle beneficiary designations?

Filed Under: Box 3, Investments, Document Organization Tagged With: Investment

« Previous Page
Next Page »

Welcome to Using Time Wisely!


Presenting organizational tips and tricks to save you money, energy, and time.

To access 5 Ways to Using Time Wisely Today, click "like" on my facebook page and join in on the journey of Using Time Wisely.

Looking for something?

Email Newsletter

Sign up to receive email updates and to hear what's going on with us!

Copyright © 2025 · Lifestyle Pro Theme on Genesis Framework · WordPress · Log in