• Home
  • About Tracy
  • Contact Me

Using Time Wisely

Organized to save money, energy, and time

  • Email
  • Facebook
  • Pinterest
  • RSS
  • Twitter
  • YouTube
  • Document Organization
    • Overview
    • Box 1
      • Credit Report/Cards
        • Credit Reports
          • Credit Updates
          • Credit Scores
        • Credit Cards
      • Personal
      • Home Ownership
      • Vehicles
    • Box 2
      • Life Insurance
      • Major Medical
      • Tax-Favored Programs
      • Prescriptions
      • Dental & Vision
      • Special Health Policies
      • Short-term Disability
      • Long-term Disability
      • Personal Insurance
    • Box 3
      • Social Security Documents
      • Retirement
      • Investments
      • Estate Planning
      • Tax Records
  • Household
    • Cleaning
    • Maintaining
    • Organizing
    • Scheduling
      • Laundry
  • Event Planning
    • Assisting
    • Attending
    • Coordinating
      • Birthday Party
      • Christmas
      • Dinner Party
      • Fall Festival
      • Field Trip
      • Lemonade Stand
      • Thanksgiving
    • Learning
    • Preparing
    • Serving
  • Miscellaneous
    • Communication
      • Customer Service
      • E-mail
      • RSS Feed Reader
    • Goals
    • Organization
    • Time Management
      • To Do List
  • Food
    • Food Prep
    • Grocery Shopping
      • Lists
      • Pricing
    • Menu Planning
    • Recipes
    • Stockpile
  • Family Activities
    • Going Out
      • Free Outings
      • Inexpensive Outings
      • Summer
    • Rewards
      • Good Grades
      • Reading
      • Summer Reading
    • Staying at Home
  • Stretching Your Dollars
    • Daily Deals
      • Groupon
      • LivingSocial
    • Drugstores
      • CVS
    • Gas Prices
    • Gifts
    • On-line Shopping
    • Pictures
    • Products
    • Restaurants
    • School Items
    • Tips
You are here: Home / Archives for Food

Grocery Shopping: Gathering your Savings – Part 3c of 3

November 24, 2011 by Tracy

Photograph Credit: Flickr (Bethany Lynne)

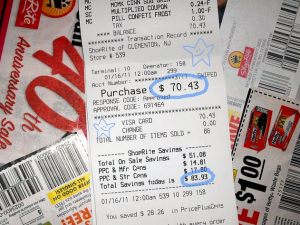
Battling the grocery stores this week was a bit tricky with all the shoppers gathering their savings for their Thanksgiving feasts. With my grocery list in hand, a plan of action, and patience maneuvering through the aisles, I gathered my savings, chose a checkout station, and used my coupons before paying for my purchases. Then before leaving the store, I made sure to check the receipt and request any rain checks.

Checking the Receipt

Though there are times when I need to quickly leave the store and I choose to check my receipt at home, I usually take the time to check my receipt at the store. If I find a problem, then I can address it immediately. When checking the receipt, I look for these savings:

1. Verify that all qualifying coupons doubled. Sometimes when a coupon is entered manually, the cashier must also manually enter the amount to double. Having caught a few errors from lack of doubled coupons, I scan my receipt immediately after checkout. If I find an error, I go to customer service for my reimbursement.

NOTE: Knowing your store’s coupon policy is the key. In my area, Bi-Lo doubles coupons up to $.60 whereas Publix doubles up to $.50. If I use a $.55 coupon at Bi-Lo and did not receive the extra coupon credit from doubling, then I will be stopping by customer service.

If I used the same coupon at Publix, I will not use my time to address this issue with customer service since the coupon did not qualify for doubling.

2. Check rain check amounts. Recently, I used a rain check for 6 frozen vegetable items. Out of the 6 boxes I purchased, 2 of them were on sale the week I used the rain check. When the cashier adjusted the prices for the Buy One Get One Free rain check, he used the sale price. By checking the receipt, I realized the error and proceeded to customer service. The error was quickly rectified, and I received a $1.85 refund.

3. Confirm promotional points. As a provider of Fuelperks! awards, Bi-Lo runs specials for bonus points. When I purchase a deal with bonus Fuelperks!, I will check the receipt to be sure the additional points are added to my total. Thus far, all our Fuelperks! have been calculated correctly. However, if there is a problem, I would address it immediately at customer service.

4. Scan the entire receipt to find reusable bag credits. At stores that give credit for using reusable bags, the credit can be listed anywhere on that receipt. I have found the credit up with the checked-out items as well as in the coupon section. Before requesting an additional credit, I verify with the cashier that the credit was given. Then I inspect the receipt to find the credit to be sure all the credits were entered.

Requesting Rain Checks

Before leaving the store, I will check my grocery list. If there are any items that I planned to purchase but the store shelf was empty, then I swing by customer service. At the counter, I will request a rain check for the out-of-stock item with the quantity needed. Each store is different. Some Publix representatives write the rain check for the exact flavor while other representatives just list the item.

TIP: For items that your family eats often, consider getting a rain check if one of the flavors is out-of-stock. For example, when Publix was running a sale on Pepperidge Farm Goldfish for $1 per bag, I brought 6 coupons for $.55 off (not subject to doubling).

When I arrived at the cracker aisle, I found that all the baby goldfish bags were out-of-stock. Since these are my youngest daughter’s favorites, I made a note on my grocery list, chose 6 bags of other available flavors, and used my 6 coupons. After checkout, I requested a rain check for 6 more bags of the baby goldfish.

Within 2 weeks, I had gathered another set of 6 coupons and used my rain check to extend those savings on a week when the goldfish were not on sale. (No, we did not eat all the goldfish within 2 weeks. However, I do stock up at this rock bottom price since this sale only comes around every few months.)

In using time wisely, a little time to scan the receipt can increase your savings. By making sure the transaction is accurate before leaving the store, you can save money (by correcting the errors), energy (from explaining the error from a previous visit), and time (stopping by customer service before the next shopping trip). Though these little details take time, I find these moments using time wisely. My children enjoy asking for stickers while we wait for rain checks to be written, and they are learning the value of checking the receipt and requesting rain checks. Happy savings!

Question: What errors have you found on your receipts? Please add your answer to the comments.

Filed Under: Grocery Shopping, Food Tagged With: grocery shopping

Grocery Shopping: Taking a Break

December 1, 2011 by Tracy

Photograph Credit: Flickr (Fabián Luque)

Even with the whirlwind of activity of sick children, bills to be paid, laundry to tackle, and meals to make, I have kept up with grocery shopping each week. By snagging all these great buy one get one free deals, our pantry, freezer, and refrigerator are well-stocked.

Since I do not like to shop without my coupons being organized, my husband has graciously taken on the responsibility of cutting the coupons. I only need to purge my coupons at the beginning of each month and file the coupons each week. This process gets the task complete while using time wisely.

With all my coupons in place and the grocery store sales reviewed, I realized that there are no great sales this week. Therefore, I’m taking a break. This break has many benefits:

Money Saving Benefits

  • No gas spent driving to 2 stores
  • Stashing away this week’s grocery budget allotment for another week when there are fantastic savings to be had

Energy Saving Benefits

  • No working on the deals with grocery lists and coupon match-ups
  • No pushing the cart around the store and gathering my savings
  • No unloading at checkout or at home
  • No calculating my savings results

Time Saving Benefits

  • No gathering my coupons
  • No grocery lists
  • No driving to 2 different stores
  • No searching for the deals
  • No checking out
  • No unloading
  • No restocking my refrigerator, freezer, and pantry
  • No recording of my spending and savings

Wow! I love all these money, energy, and time saving benefits. Can I take a break from grocery shopping next week, too? Though I like the break, I guess the store sales cycles will determine my level of shopping. But during this season of repeat sales and shallow discounts, I will enjoy using time wisely by taking a break.

When you are in a week of pure busyness, turn to your stockpile and take a break from grocery shopping. As you get back on track, you will be better ready to seize those sales. Happy relaxing! You do remember how to relax. Don’t you? 🙂

Question: How often do you take a break from grocery shopping? Please add your answer to the comments.
Filed Under: Grocery Shopping, Food Tagged With: break

Grocery Shopping: Giving Groceries a Home – Part 1 of 3

December 8, 2011 by Tracy

Photograph Credit: Flickr (Jerry Whiting)

Are you seeing any increase in your savings? Have you implemented any changes to your typical grocery shopping trips? Though saving 40-60% each week is my goal, be thrilled with saving 10-20% as you implement a new savings strategy. Saving little by little will add up as you continue to find tricks that work for you.

As we near the end of this series on my food cycle, here is a quick overview up to STEP SIX out of seven total steps:

My Menu Planning Process

Step One: Choosing a menu plan.

Step Two: Adding meals to your plan from the food you have on hand.

Step Three: Continuing to add meals.

My Grocery Shopping Process

Step Four: Creating grocery lists.

    • Part 1: Identify needed items.
    • Part 2: Select sale items.
    • Part 3: Compile a list for each store.

Step Five:  Gathering your savings.

    • Part 1: Entering the store.
    • Part 2: Shopping your list.
    • Part 3: Checking out.

Step Six: Giving your groceries a home.

    • Part 1: Unloading your savings.
    • Part 2: Organizing your savings (future post).
    • Part 3: Preparing for future savings (another future post).

Surviving the grocery store process with three active children and lots of savings, I return to give my savings a home. Before relaxing on the couch with a little one on each side, there is still work to be done. Having accomplished deep savings, I do not want these groceries to spoil. Therefore, I begin unloading all these savings.

Unloading the car

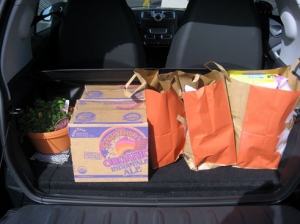
With my children occupied either inside or outside, I begin by bringing in the bags and boxes. My long kitchen counter holds most of the bags. If I need additional space, I will either moved to the counter by the refrigerator or place my non-food savings on the floor. Once my vehicle is unloaded, I close the trunk, car doors, and garage door before returning to the kitchen.

Unpacking the groceries

With the bags on the counter, I start at the beginning of my counter as I walk into my kitchen by taking all the items out of the bag and placing them on the counter. The bag is then either folded (reusable) or tossed on the floor (plastic) for later. When one bag is done, I then proceed to the next until all the groceries are on the counter and all the bags are off.

Unloading the car and unpacking the groceries on my counter allows me to see where I need to concentrate. The next post in this series will explain how I organize my savings from this point. Though this process seems to take quite a bit of time, the more it is repeated, the quicker I become.

This process works for me. If you have a small space in which to work, then find a system that helps you be efficient. Willing to try a new way of doing things helped me save 40-60% off my grocery bill. You can do the same. Just be willing to try. Happy experimenting!

Question: What odd-to-you idea have you tried that really worked beyond your expectations? For me, making a menu with what I had on-hand and then shopping only the sales was a “weird” idea that really works! Now I cannot go back to paying full price for items that will soon be on sale. Keep your comments coming! Love to hear your answers.

Filed Under: Grocery Shopping, Food Tagged With: grocery shopping

Grocery Shopping: Giving Groceries a Home – Part 2a of 3

December 15, 2011 by Tracy

Photograph Credit: Flickr (Bosch Appliances)

Even after eating a cookie while grocery shopping, my children are usually STARVING by the time we walk into the house. Not sure if it is all the food they see, or just the time of day. Whatever it is, they are hungry.

Upon sending them to the pantry for nourishment (ahem) or junk food, I concentrate on the counter full of groceries that I just unloaded. Before giving my pantry items a home (which will be covered in Part 2b), I turn my attention to the cold items which will be placed in the refrigerator or freezer.

Organizing the Refrigerator

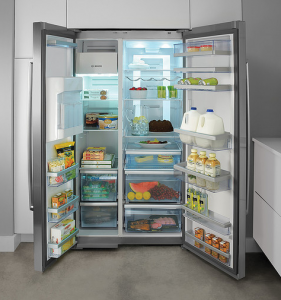
Each shelf or drawer in my refrigerator holds certain items. By keeping the same system, I can quickly put items away and retrieve them while preparing meals and snacks. Though there are exceptions to these guideline when hosting parties, holidays, and other events, my refrigerator contains the following items on each shelf or in each drawer:

    • Shelf #1 – beverages
    • Shelf #2 – butter, eggs, bread, and sourdough starter
    • Drawer #1 – cold cuts and bread dough
    • Shelf #3 – yogurt, sour cream, and cream cheese
    • Shelf #4 – leftovers
    • Drawer #2 – fruits (apples, oranges), vegetables (potatoes, carrots), and spice (garlic)
    • Drawer #3 – all cheeses

As I put the cold items away, I will stack new items on the bottom or in the back of existing products. By doing so, the older item gets used prior to the new container being opened. Though this is the goal, I currently have two opened jars of apple sauce on the fourth shelf in my refrigerator. 🙂

Organizing the Freezer

If I will be using the frozen item in the next week, then I place it in the freezer side of my side-by-side refrigerator in the house. All the other frozen items are place in our chest freezer housed in the garage. Again, having an organized system helps the “putting away” to go quickly. I have our chest freezer organized as follows:

Left side

    • Packaged meats (ham, turkey, bacon, chicken, hot dogs, sausage)
    • Boxed meals

Center basket

    • Hamburger
    • Roasts
    • Steaks

Center bottom

    • Pizzas
    • Breads
    • Desserts
    • Double batch cooking (For some meals, I make multiple portions to save for busy nights.)

Right side

    • Vegetables
    • Pork chops
    • Breakfast foods

When I put these items away, I place the newer items on the bottom or in back of other existing product. Any meats that need to be cut up or packaged together (i.e., chicken, pork chops, etc.), I put in the refrigerator until after all the groceries are put away. Then during meal preparations, I will divide up the hamburger, pork chops, etc., wrap, and place them in the chest freezer.

With all the cold items placed in the refrigerator or freezer, I can then concentrate on meeting my children’s needs. After addressing their starving situation and refilling their drinks, I then continue giving the other groceries a home which will be covered next week. In using time wisely, I have a designated spot for each type of item. This system works for me. Hope it works for you as well. Happy organizing!

Question: Do you designate shelves and drawers for specific items in your refrigerator and freezer? Please add your answer to the comments.
Filed Under: Grocery Shopping, Food Tagged With: food, grocery shopping

Grocery Shopping: Giving Groceries a Home – Part 2b of 3

January 5, 2012 by Tracy

With entertaining company, accumulating new items, and visiting friends and family, my house (except for my dining room) needs attention. My progress is slow, but I’m gaining momentum. On the agenda today is grocery shopping.

As I scrape together meals on what we have on-hand (or borrow from my fabulous neighbor :-)), I value the buying ahead principle. Keeping my refrigerator, freezer, and pantry well-stocked with merchandise purchased at rock bottom prices stretches our budget, especially when life gets busy.

At the beginning of December 2011, I introduced step six: giving your groceries a home. In part 1, I shared how I unload my savings upon returning from the grocery store. The next week in part 2a, the cold items were given a home on designated shelves and sections of my refrigerator and freezer. Today, I will continue with the series on organizing my pantry with the remaining deals from grocery shopping.

Pantry

Finding an organizational system that works for you may take some time. I share with you my system that has evolved over the years. Since I am shorter (5’4”), I place most of the items on shelf #2 and lower. The top shelf houses items I use infrequently since I have more difficulty reaching those items. With that said, I still use the shelf, I just ask my tall (6’2”), handsome hubby to use his strong muscles to help this damsel in distress with her 5 lb. bag of flour. 🙂

Tracy’s Pantry Organization:

Shelf #1 (top shelf) – flour, confectioner’s sugar, brown sugar, cake mixes, brownie mixes, and spices

Most of my spices stay on two racks on the inside door of my pantry. The spices on the top shelf are rarely used or the containers are too big to fit in my rack.

Shelf #2 – condiments, dry oatmeal, bread crumbs, pudding, and jello

Shelf #3 – pasta, rice, sides, popcorn, crackers, and a basket with baking ingredients (chocolate chips, marshmallows, etc.)

Shelf #4 – canned goods and instant beverage mixes (tea bags, hot cocoa, lemonade, etc.)

Floor of pantry – bottled beverages, chips, cereals (boxed and instant – oatmeal, grits), sugar, and snacks

By designating the type of items for each shelf, I can easily find the ingredients I need. Sometimes one shelf will get overloaded from a great sale, and I will “borrow” space from another shelf until space becomes available.

I also keep a box out in my garage for overflowing items, like the extra 6 bags of 4 lb. sugar packages I purchased for $.71 (shared this deal on Facebook on November 24).

Tracy’s Tips:

1. Keeping snacks and cereal at the bottom allows little ones to help at meal time.

2. Can goods dropped from any height could crack or damage your floor. Though I have not had this happen to my floor, I have had my toes crushed. Ouch!

3. Keeping like items together aids in making your grocery list as you scan your available resources

4. Add newly purchased items to the back and bring previous purchased items to the front. Keeping the items rotated will help prevent purging expired items.

5. When an arrangement is not working, fix it. The longer it bothers you, the more time you waste.

6. Teach your little ones your organizational system. They LOVE being big helpers (most of the time).

By the time my pantry items are on assigned shelves, my groceries have all been given a home. In using time wisely, I usually reorganize my pantry at least twice a year. Anytime the shelves get a little thin, I use that opportunity to reorganize before restocking.

As you find an organizational system that works for you, putting your groceries away and retrieving them will take little time. Keep plugging away while using time wisely, and happy organizing!

Question: How do you organize your pantry? Please add your answer to the comments.

Filed Under: Grocery Shopping, Food Tagged With: grocery shopping

« Previous Page
Next Page »

Welcome to Using Time Wisely!


Presenting organizational tips and tricks to save you money, energy, and time. Enjoy the journey of Using Time Wisely.

Looking for something?

Copyright © 2026 · Lifestyle Pro Theme on Genesis Framework · WordPress · Log in