• Home
  • About Tracy
  • Contact Me

Using Time Wisely

Organized to save money, energy, and time

  • Email
  • Facebook
  • Pinterest
  • RSS
  • Twitter
  • YouTube
  • Document Organization
    • Overview
    • Box 1
      • Credit Report/Cards
        • Credit Reports
          • Credit Updates
          • Credit Scores
        • Credit Cards
      • Personal
      • Home Ownership
      • Vehicles
    • Box 2
      • Life Insurance
      • Major Medical
      • Tax-Favored Programs
      • Prescriptions
      • Dental & Vision
      • Special Health Policies
      • Short-term Disability
      • Long-term Disability
      • Personal Insurance
    • Box 3
      • Social Security Documents
      • Retirement
      • Investments
      • Estate Planning
      • Tax Records
  • Household
    • Cleaning
    • Maintaining
    • Organizing
    • Scheduling
      • Laundry
  • Event Planning
    • Assisting
    • Attending
    • Coordinating
      • Birthday Party
      • Christmas
      • Dinner Party
      • Fall Festival
      • Field Trip
      • Lemonade Stand
      • Thanksgiving
    • Learning
    • Preparing
    • Serving
  • Miscellaneous
    • Communication
      • Customer Service
      • E-mail
      • RSS Feed Reader
    • Goals
    • Organization
    • Time Management
      • To Do List
  • Food
    • Food Prep
    • Grocery Shopping
      • Lists
      • Pricing
    • Menu Planning
    • Recipes
    • Stockpile
  • Family Activities
    • Going Out
      • Free Outings
      • Inexpensive Outings
      • Summer
    • Rewards
      • Good Grades
      • Reading
      • Summer Reading
    • Staying at Home
  • Stretching Your Dollars
    • Daily Deals
      • Groupon
      • LivingSocial
    • Drugstores
      • CVS
    • Gas Prices
    • Gifts
    • On-line Shopping
    • Pictures
    • Products
    • Restaurants
    • School Items
    • Tips
You are here: Home / Archives for Household / Cleaning

Purging, Cleaning & Organizing: Warranty File

January 9, 2012 by Tracy

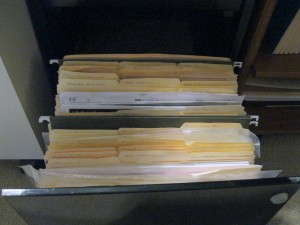
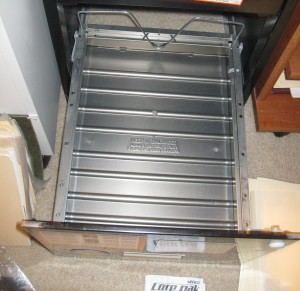
After sorting through all the paperwork from all the new electronics, gadgets, and toys, I went to add the documents to our warranty file, housed in a two-drawer filing cabinet. When I opened the bottom drawer, I found the file stuffed and in need of purging, cleaning, and organizing. Oh, my!

Seriously . . . it was a mess.

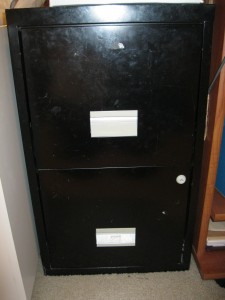
In case you are wondering about this file, the outside is usually covered with magnets which my girls enjoy putting on and taking off while I work at my desk. See the little finger prints all over the outside. 🙂 But inside, it holds all the documentation and receipts from purchases that carry a guarantee.

In using manila file folders, I label each folder with the type of documentation, e.g., phones, tools, appliances, furniture, etc. Over time, we replace items, donate, trash, or use the items.

Periodically, this file needs purging of obsolete items to keep the folder contents current. I think my “periodically”  extended a few years on this file because I found expiration dates from 2004.

I told you it was a mess.

In working on this project, I spent about 2 hours from purging to cleanup with a wonderful result.

Purging the Drawer

1. Gathered my supplies. After deciding to purge this file, I got the new documents, a pen, and manila file folders.

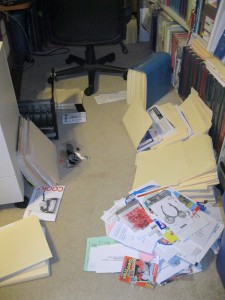
2. Purged each file. Removed one folder at a time and reviewed the contents. When I found paperwork for items we no longer have, I placed them in a trash pile (bottom right pile in picture below). The documents for items we are using were kept in the file.

3. Emptied the entire drawer. Taking out one file at a time, I worked through each file until the drawer was empty.
Cleaning the Drawer

1. Dusted the file drawer

2. Removed shreds of paper

3. Wiped the drawer clean

Organizing the Drawer

1. Arranged the file folders. In keeping this file divided into three sections, I placed each file folder into one of these three piles:

a. Structure of the house – windows, roof, shower units, etc.

b. Décor of the house – paint, ceiling fans, lighting, etc.

c. Products of the house – electronics, toys, jewelry, etc.

2. Combined file folder content. When I found similar products, I joined them into one category. For example, I placed the files for the lawnmower, edger, and weed whacker into one lawn equipment file folder.

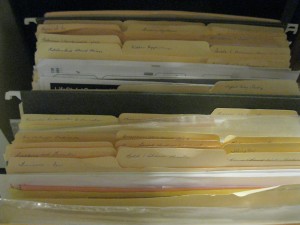
3. Labeled each file folder. In keeping it simple, I wrote the category name on the label of the file folder. As I need items from this file, I can read the labels to quickly find the folder I need.

4. Returned folders to cabinet. With the sections organized and labeled, I placed them back into the filing cabinet. I used hanging file folders to divide the file folders into sections.


Cleaning Up

1. Trashed the unused file folders

2. Placed the outdated warranty pile in the To Be Shred box

3. Put away the pen and extra file folders

Instead of an overflowing heap of papers, I can open this drawer and find the document I need – with room to spare. In using time wisely for about 2 hours, I purged, cleaned, and organized my warranty file. For me, this was time well-spent.

As you find outdated systems, like overflowing paperwork, schedule time to purge, clean, and organize. Using time wisely can get you from “Oh, My!” to “Oh, yes!” Happy organizing!

Question: Where do you keep your warranty paperwork? Please add your answer to the comments.

Filed Under: Cleaning, Household, Organizing Tagged With: cleaning, organizing, purging

Cleaning: Microwave Oven

September 26, 2011 by Tracy

Photograph Credit: Flickr (Bella)

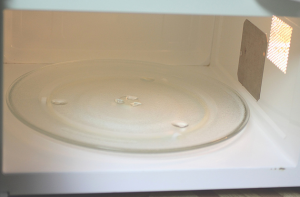
Keeping the microwave oven wiped down and clean is an on-going task. Knowing that 1 minute now saves 5 minutes later, I try to keep messes at bay by wiping up messes before they dry.

Though I am not the only one who uses the microwave in my home, I do, on occasion, choose to leave a mess. There are times when soothing a hurt finger or changing a diaper takes precedence over cleaning the microwave. 🙂

When I find a baked-on mess, here’s my simple solution:

1. Take a glass measuring cup and add about 2 cups of water.

2. Place the measuring cup with water into the microwave.

3. Zap the water for 5 minutes on high.

4. At the end of 5 minutes, allow the water to remain in the microwave for an additional 2 minutes.

5. Carefully, remove the hot measuring cup.

6. Using a sponge or rag, wipe down the microwave.

In using time wisely, I can put on the water while wiping down the counters and loading the dishwasher. This cleaning method not only results in a clean microwave, but it also saves me money (no cleaning solutions), energy (no scrubbing), and time (just wiping out the mess without working at it). If your microwave needs a cleaning, try heating water and wiping away the mess. The results are worth it. Happy cleaning!

Question: What is your best tip for cleaning the microwave oven? Please add your answer to the comments.
Filed Under: Cleaning, Household Tagged With: cleaning

Cleaning: Bissell PowerSteamer PowerBrush Deep Cleaner

September 12, 2011 by Tracy

Photograph Credit: Wal-mart

Most people would request a new gadget, clothing item, or service for their birthday present. Since I am far from “most people,” you might be surprised to learn that my birthday wish was a carpet cleaner. Yes, I really wanted a cleaning helper for my carpets.

With baby one and baby two, I was able to keep up with the messes they made. I would use Resolve Carpet Cleaner on the spots, and keep my carpets nice and clean. With baby three, my schedule is much busier. If I can stay on top of the laundry and meals, then I had a successful day.

The little messes on the carpet are no longer a high priority. By the time I vacuum the floors, the spots are too much for hand scrubbing. I would be exerting lots of energy and spending precious time cleaning.

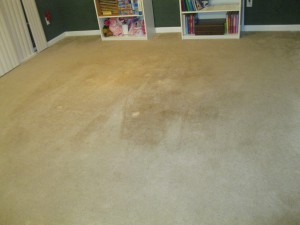
Dining Room Floor - Before using the Carpet Cleaner

Desiring to have a clean, organized home and balancing home life, family activities, and blogging, I needed some added assistance with the carpets. Though hiring a carpet cleaning service would have solved the immediate issue, I still would need to keep up the spot cleaning.

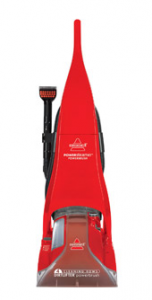
In looking for a more permanent solution, I found this Bissell PowerSteamer PowerBrush Deep Cleaner for carpets at www.walmart.com for $125. Paul and I compared some other carpet cleaners, and this model had the options we deemed necessary for our household.

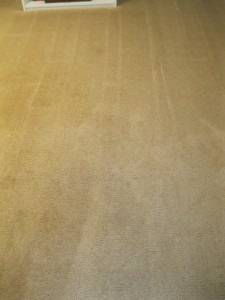
With my birthday around the corner, Paul purchased this steam cleaner. We used it the weekend after it arrived, and my carpets sparkled (if that’s possible). I have been thrilled with this carpet cleaner!

Dining Room Floor - After using the Carpet Cleaner

Favorite Options

1. The Settings. This model offers normal, heavy traffic, and water rinse settings. On the first pass, Paul used the normal setting which brought up dirt, dust, and hair. After allowing the floor to dry, he then water rinsed the area to remove all the cleaning solution. The heavy traffic setting was needed on our hallway to bring the carpet back to its “normal” color. 🙂

2. The 2 in 1 Tank. Having used another carpet cleaner where the solution and water were mixed in the same container, I really like how this cleaner keeps the solution separate. The solution does not need to be refilled when the water is replaced. Having the solution in a separate compartment stretches the solution which saves money.

3. Attachment for Stairs. With little spots from sippy cups, drool, and super-saturated diapers on my stairs, I really like this attachment. Though we have not used it yet, I am thrilled to have this option. Most of the other carpet cleaners, within our price range, did not offer this attachment.

4. 25’ Cord Length. Some of the other models had shorter lengths. With the longer cord, I can complete an entire room without having to change outlets.

5. Deep Clean. This cleaner pulled up so much dirt. You could see the difference immediately. I love having clean carpets!

Possible Drawbacks

1. Type of Carpet Cleaner. Though the title is a PowerSteam, this cleaner is NOT a steam cleaner. The machine does not heat the water like a steam cleaner instead hot water, added to the container, cleans the carpet. To get the carpets clean, you need to add the hot water and then clean immediately. This option works fine for our family. We only have fish for pets, so most of my spots are food or liquids.

2. The Weight. This cleaner is heavy. It weighs over 20 lbs. The pushing and pulling to clean a large area is a lot of work. Paul was sore after cleaning all the downstairs’ carpets in one weekend. However, if you space out the cleaning, then the weight may be more tolerable.

3. Hard Floor Scrubber. My model will clean hard floors, but the attachment must be purchased separately. I have limited hard floors, so I do not need this attachment.

For me, this Bissell carpet cleaner has been a blessing! I can do a surface cleaning of a spill and wait to use the Bissell carpet cleaner at a later time. Though this model may not work for others, I have been thrilled with my birthday present resulting in clean carpets. Thanks, Babe!

Question: What is on your birthday list? Please add your answer in the comments.

Filed Under: Cleaning, Household Tagged With: Deep cleaning

Cleaning: Use Both Hands

July 25, 2011 by Tracy

Photograph Credit: Flickr (atf300)

Have you ever considered how you clean? If someone asked me this question, my response would be: “Yes, I clean top to bottom and right to left.” But after watching someone else clean, I will now add to my previous answer, “with both hands.”

My Observation

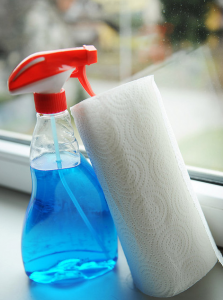
Recently, I had the opportunity to observe someone clean a store’s glass windows. These windows were rather tall, and the washer was concentrating on the lower half. She kept her right hand busy with all these tasks:

  • picking up the glass cleaner bottle from her cart,
  • spraying the glass,
  • placing the glass cleaner bottle back in the cart,
  • picking up the squeegee, and
  • working the squeegee in a zigzag motion from the middle of the pane to the floor.

Though her right hand was busy, she kept her left hand on her hip without utilizing it. I kept waiting to see if she would switch hands, but she did not. She was not in any rush, for she would stop to watch customers and to rest her right arm. (That right arm must have been quite tired.)

My Response

While watching her, I was thinking how this process could be improved to use her time wisely with the least amount of effort. These are my tips:

1. Use both hands. Hold the cleaner in one hand and the squeegee in the other. When one shoulder, arm, or hand gets tired, switch those products to the other hand.

2. Stay focused. Look at the window and keep working. As you complete a section, begin the next.

3. Continue to work from top to bottom. If you start at the bottom, you will likely need to re-do some or the entire lower portion when you clean the top.

Though I do not anticipate cleaning tall windows anytime soon, I will be emptying out my dishwasher, putting away folded laundry, and stacking grocery items in my pantry. So, as I accomplish these household tasks, I plan to use both hands, stay focused, and continue to work from top to bottom.

Question: What tips or tricks have you discovered from watching someone clean well or poorly? Please share your answer by clicking the Leave a Comment link below.

Filed Under: Cleaning, Household Tagged With: cleaning

Multitasking: Giving Attention and Folding Laundry

June 27, 2011 by Tracy

As my children continue through this really long phase of “Watch me,” I find myself constantly distracted from my tasks at hand. Routine chores can take twice as long due to the number of interruptions and moments spent watching my children. Realizing that my children will not be young long, I try to multitask as often as possible.

This evening while timing my loads of laundry, I gave my older kids the attention they craved while folding clothes. With the timer set for ten minutes, my son began playing his Wii game while I watched him and folded the laundry. He enjoyed explaining his player’s moves and being the center of attention. When the timer sounded, my son was off to take his shower.

My daughter’s game was then setup, and she received the attention. Of course, she needed help, but she was focusing on her game and showing me how she was winning. At the end of the time limit, my kids had been given special attention, and my load of laundry was folded.

In using my time wisely, I was able to multitask by giving my kids the attention they desired while folding a load of laundry. Though I am always looking for ways to multitask, I do not always succeed.

My goal is to use my time wisely while spending time with my family and keeping our home running as smoothly as possible. Multitasking saves me time and energy. I just need to find the components that work for me. If you have mastered a chore by multitasking, please share your success in the comments.

Filed Under: Cleaning, Household, Maintaining Tagged With: laundry

« Previous Page
Next Page »

Welcome to Using Time Wisely!


Presenting organizational tips and tricks to save you money, energy, and time.

To access 5 Ways to Using Time Wisely Today, click "like" on my facebook page and join in on the journey of Using Time Wisely.

Looking for something?

Email Newsletter

Sign up to receive email updates and to hear what's going on with us!

Copyright © 2025 · Lifestyle Pro Theme on Genesis Framework · WordPress · Log in