• Home
  • About Tracy
  • Contact Me

Using Time Wisely

Organized to save money, energy, and time

  • Email
  • Facebook
  • Pinterest
  • RSS
  • Twitter
  • YouTube
  • Document Organization
    • Overview
    • Box 1
      • Credit Report/Cards
        • Credit Reports
          • Credit Updates
          • Credit Scores
        • Credit Cards
      • Personal
      • Home Ownership
      • Vehicles
    • Box 2
      • Life Insurance
      • Major Medical
      • Tax-Favored Programs
      • Prescriptions
      • Dental & Vision
      • Special Health Policies
      • Short-term Disability
      • Long-term Disability
      • Personal Insurance
    • Box 3
      • Social Security Documents
      • Retirement
      • Investments
      • Estate Planning
      • Tax Records
  • Household
    • Cleaning
    • Maintaining
    • Organizing
    • Scheduling
      • Laundry
  • Event Planning
    • Assisting
    • Attending
    • Coordinating
      • Birthday Party
      • Christmas
      • Dinner Party
      • Fall Festival
      • Field Trip
      • Lemonade Stand
      • Thanksgiving
    • Learning
    • Preparing
    • Serving
  • Miscellaneous
    • Communication
      • Customer Service
      • E-mail
      • RSS Feed Reader
    • Goals
    • Organization
    • Time Management
      • To Do List
  • Food
    • Food Prep
    • Grocery Shopping
      • Lists
      • Pricing
    • Menu Planning
    • Recipes
    • Stockpile
  • Family Activities
    • Going Out
      • Free Outings
      • Inexpensive Outings
      • Summer
    • Rewards
      • Good Grades
      • Reading
      • Summer Reading
    • Staying at Home
  • Stretching Your Dollars
    • Daily Deals
      • Groupon
      • LivingSocial
    • Drugstores
      • CVS
    • Gas Prices
    • Gifts
    • On-line Shopping
    • Pictures
    • Products
    • Restaurants
    • School Items
    • Tips
You are here: Home / Archives for Household / Maintaining

Cleaning: Ridding Mildew from the Dishwasher

September 10, 2012 by Tracy

Ridding mildew from the dishwasher

Ridding mildew from the dishwasherUpon returning home from our vacation, I found mildew growing in our dishwasher. Disgusting!

My house was nice and clean with I left, so I was surprised that my dishwasher did not enjoy its vacation from us. 🙂

Since we do not use paper plates in our home, I serve each meal on our everyday ceramic dishes. With dishes from three meals a day and snacks, our dishwasher gets a workout.

The warmth inside and the bout of inactivity brought on a growing case of mildew.

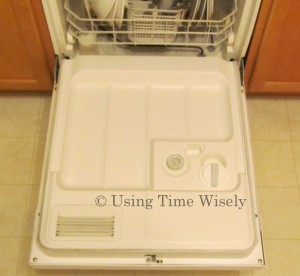
Though the black residue was only on the sides and the vent of the door, I quickly started ridding mildew from the dishwasher.

Ridding Mildew from the Dishwasher

  • Tracy’s Tools of the Trade

1. Lysol Antibacterial Kitchen Cleaner

2. Toothbrush

3. Old towel

  • Tracy’s Cleaning Technique

1. Spray the mildew with the Lysol Antibacterial Kitchen Cleaner

2. Wait about 5 minutes

3. Use the old toothbrush to remove stubborn mildew from the sides and vents

4. Dry off with the towel

One of the sides needed extra scrubbing to release the mildew. To get a thorough cleaning, I scrubbed inside the rubber seals around the dishwasher door which trapped mildew in the creases.

Preventing Mildew from the Dishwasher

In running our dishwasher almost every day, I did not realize that frequent use keeps mildew away. Simple wipe downs and scraping food from the dishes prior to loading the dishwasher keep the appliance parts clean and clear to operate efficiently.

For more tips, visit this How to Clean and Maintain a Dishwasher post which explains how to take the dishwasher apart for a thorough cleaning.

 As you load and unload your dishwasher, check and rid mildew before it builds up. Keeping your appliance clean and clear of debris prevents overworking your dishwasher. Yes, it takes time, but in using time wisely, your efforts can lengthen the longevity of your household appliances which saves you money, energy, and time. Happy cleaning!

Question: How often do you run your dishwasher?

Filed Under: Cleaning, Household, Maintaining Tagged With: dishwasher

2012 Second Quick Tip Week: Using Vinegar to Kill Weeds

June 25, 2012 by Tracy

Photograph Credit: Microsoft Images

Our Quick Tip Week continues today in the household category, specifically yard work. 

In continuing to care for our yard, garden, and beds, we treat our driveway and sidewalk with weed killer. The grass and weeds sprout through the cracks contributing to a messy look.

Quick Tip #2: Using Vinegar to Kill Weeds

Though not recommended for the yard, gardens, or flower beds, vinegar (white or apple cider) will kill the weeds on hard surfaces.

In reading this Vinegar for Killing Weeds article, I learned that vinegar strips the waxy coating from the leaves making it impossible for the plant to survive. The best part, one or two applications will solve the problem. Presto!

In using time wisely to improve your sidewalks, brick patios, and driveways, consider pouring or spraying white vinegar into the cracks while saving money, energy, and time. Happy maintaining!

Question: How do you kill weeds?

Filed Under: Quick Tip Week, Maintaining, Household Tagged With: quick tips

2012: Spring Yard Work – Part 3 of 3

June 4, 2012 by Tracy

Photograph Credit: Microsoft Images

Hoping to show you our completed project today, I can only show a half-finished yard. Though we only have about half an hour of work left to complete the two smaller beds, we did not finish in time for this post.

In using time wisely, we spent the weekend with friends celebrating birthdays and enjoying each other’s company. If all goes as planned, our last two beds will get finished this week.

Thankfully, the two larger areas are complete and look so much better than when we started. Our yard is improving which is progress. The weed killer applied to our grass has reduced the weeds and improved our grass. Love it when one application solves the immediate problem. Now, we will progress to fertilizing.

In earlier posts, I humbly shared our yard’s overgrown weeds and how we removed the edgers and cleaned out the beds in part 1. Then in part 2, I showed how my husband Paul prepared the beds and then treated the beds. In part 3, I will present the finished product after adding new mulch and spreading it in our long bed and under our tree.

Add New Mulch

Wow, mulch bags are heavy! Having loaded the mulch on a cart at Lowe’s, then from the cart to our van, next from the van to our garage, and finally from the garage to the beds tired out Paul. Moving those bags so many times brought shoulder and back pain for a few days to Paul. Yet, he continued to work to beautify our yard. 🙂

For our long bed, Paul added four bags of mulch. The bed under the tree took 2 bags, and the 2 smaller beds together should take 3 bags.

Spread the Mulch

Adding four bags of new mulch to the long bed, Paul spread it evenly and adjusted any edgers to keep the bed’s appearance uniform.

In repeating this process under the tree, the edgers needed more adjusting to keep the mulch from cascading into the grass.

Add More Mulch

Once we spread the other 2 bags of mulch in the last 2 beds, we will begin filling in bare spots. We will use the last 3 bags of mulch to create a uniform appearance in all four beds.

In using time wisely this spring to improve our property, we completed our spring yard work for 2 of our 4 beds by adding new mulch and spreading the mulch. Once the other two beds are complete, we will add more mulch to unify all 4 beds.

As you plan your spring yard work projects, take it step by step. With a little planning and lots of hard work, your yard will improve little by little. Enjoy the process and happy improving!

Question: How’s your yard work coming along?

Filed Under: Household, Maintaining Tagged With: yard work

2012: Spring Yard Work – Part 2 of 3

May 28, 2012 by Tracy

Our yard work is underway. Last week, I shared how Paul cleaned out all the weeds, grass, and old mulch from our 4 beds in the front yard. Starting with a clean bed, we chose to prepare and treat the beds before adding the mulch.

Prepare the Beds

After removing all the debris, Paul laid down a thick layer of newspaper on top of the dirt bed. The newspaper helps prevent weeds and grass from seeping up through the mulch and edgers.

To keep the newspaper in place, Paul laid the edgers on the newspaper at the edge of the bed. Hopefully, the newspaper will keep the weeds from popping up between the stones.

Treat the Beds

With a liquid mixture, Paul attached the bottle to the hose and sprayed weed killer over the beds, including the newspaper. With the double protection of the newspaper and weed killer, we hope to lessen the amount of work needed in our yard this summer and fall. 🙂

To get our yard looking presentable again after removing the weeds and former mulch, we prepared and treated our beds to deter the weeds. Our yard is looking better after some tender loving care. Next week, I will end this series with pictures of the finished product. Stay tuned . . .

Question: What yard projects keep you busy?

Filed Under: Household, Maintaining Tagged With: yard work

2012: Spring Yard Work – Part 1 of 3

May 21, 2012 by Tracy

Photograph Credit: Microsoft Images

Since last fall, the weeds, from what seems like the entire neighborhood, have come to stay at our house. The edgers around our flower beds received a coating of weeds and unwanted grass.

Though the project is still underway, between nights of soccer and weekends of family outings, we have begun cleaning up our front yard.

Living in a cookie-cutter neighborhood, our total amount of land is less than one acre. Our front yard consists of 3 beds in front of our house and a bed around our one tree. We also have a walkway, driveway, and sidewalk.

Keeping our yard looking nice is always a challenge with all the weeds and the different grasses: Bermuda in the front and fescue in the back. It probably doesn’t help that we do not spend lots of time in our yard, so keeping weeds out of our mulch beds is a chore.

After completing our garden in the backyard, we focused on the beds in the front yard. These BEFORE pictures show you how awful our front yard looked. The growth really took off quickly, so we moved fast to make it beautiful again.

We purchased mulch from Lowe’s on sale – 4 bags for $10. To cover all our beds, we purchased 12 bags of mulch. On a warm, sunny day, Paul got to work.

Remove Edgers

With the edgers buried under last-year’s mulch and dense weeds, Paul removed all the edgers from our 4 beds in front of our house.

Careful of bugs and ant piles, he dug up the ones deeply buried in the bed. Though he was careful, he still received a few ant bites from certain members of the ant colony that live under our tree. Ouch!


Clean out Beds

Paul then trimmed all the bushes and raked into piles all the old mulch, trimmings, and weeds. He then filled up trash bags with all the debris.

This yard work is very labor-intensive resulting in sore arms and lower back. Though the work is cumbersome, seeing the empty dirt floor creates a starting point for the work ahead.

Next week, I will share how we prepare our beds while continuing our spring yard work. (I’m using “we” liberally here as Paul has done all this yard work alone. :-))

Question: What plans do you have for your yard work this spring?

Filed Under: Household, Maintaining Tagged With: yard work

« Previous Page
Next Page »

Welcome to Using Time Wisely!


Presenting organizational tips and tricks to save you money, energy, and time.

To access 5 Ways to Using Time Wisely Today, click "like" on my facebook page and join in on the journey of Using Time Wisely.

Looking for something?

Email Newsletter

Sign up to receive email updates and to hear what's going on with us!

Copyright © 2025 · Lifestyle Pro Theme on Genesis Framework · WordPress · Log in