• Home
  • About Tracy
  • Contact Me

Using Time Wisely

Organized to save money, energy, and time

  • Email
  • Facebook
  • Pinterest
  • RSS
  • Twitter
  • YouTube
  • Document Organization
    • Overview
    • Box 1
      • Credit Report/Cards
        • Credit Reports
          • Credit Updates
          • Credit Scores
        • Credit Cards
      • Personal
      • Home Ownership
      • Vehicles
    • Box 2
      • Life Insurance
      • Major Medical
      • Tax-Favored Programs
      • Prescriptions
      • Dental & Vision
      • Special Health Policies
      • Short-term Disability
      • Long-term Disability
      • Personal Insurance
    • Box 3
      • Social Security Documents
      • Retirement
      • Investments
      • Estate Planning
      • Tax Records
  • Household
    • Cleaning
    • Maintaining
    • Organizing
    • Scheduling
      • Laundry
  • Event Planning
    • Assisting
    • Attending
    • Coordinating
      • Birthday Party
      • Christmas
      • Dinner Party
      • Fall Festival
      • Field Trip
      • Lemonade Stand
      • Thanksgiving
    • Learning
    • Preparing
    • Serving
  • Miscellaneous
    • Communication
      • Customer Service
      • E-mail
      • RSS Feed Reader
    • Goals
    • Organization
    • Time Management
      • To Do List
  • Food
    • Food Prep
    • Grocery Shopping
      • Lists
      • Pricing
    • Menu Planning
    • Recipes
    • Stockpile
  • Family Activities
    • Going Out
      • Free Outings
      • Inexpensive Outings
      • Summer
    • Rewards
      • Good Grades
      • Reading
      • Summer Reading
    • Staying at Home
  • Stretching Your Dollars
    • Daily Deals
      • Groupon
      • LivingSocial
    • Drugstores
      • CVS
    • Gas Prices
    • Gifts
    • On-line Shopping
    • Pictures
    • Products
    • Restaurants
    • School Items
    • Tips
You are here: Home / Archives for Household

Purging, Cleaning & Organizing: Warranty File

January 9, 2012 by Tracy

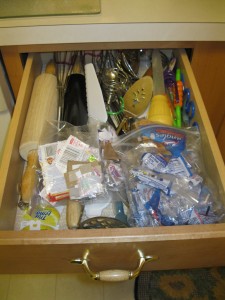
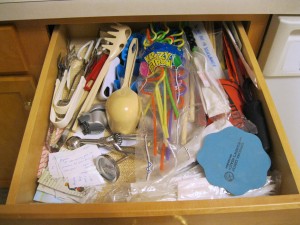
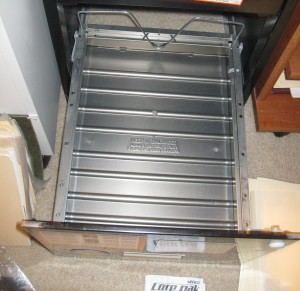
After sorting through all the paperwork from all the new electronics, gadgets, and toys, I went to add the documents to our warranty file, housed in a two-drawer filing cabinet. When I opened the bottom drawer, I found the file stuffed and in need of purging, cleaning, and organizing. Oh, my!

Seriously . . . it was a mess.

In case you are wondering about this file, the outside is usually covered with magnets which my girls enjoy putting on and taking off while I work at my desk. See the little finger prints all over the outside. 🙂 But inside, it holds all the documentation and receipts from purchases that carry a guarantee.

In using manila file folders, I label each folder with the type of documentation, e.g., phones, tools, appliances, furniture, etc. Over time, we replace items, donate, trash, or use the items.

Periodically, this file needs purging of obsolete items to keep the folder contents current. I think my “periodically”  extended a few years on this file because I found expiration dates from 2004.

I told you it was a mess.

In working on this project, I spent about 2 hours from purging to cleanup with a wonderful result.

Purging the Drawer

1. Gathered my supplies. After deciding to purge this file, I got the new documents, a pen, and manila file folders.

2. Purged each file. Removed one folder at a time and reviewed the contents. When I found paperwork for items we no longer have, I placed them in a trash pile (bottom right pile in picture below). The documents for items we are using were kept in the file.

3. Emptied the entire drawer. Taking out one file at a time, I worked through each file until the drawer was empty.

Cleaning the Drawer

1. Dusted the file drawer

2. Removed shreds of paper

3. Wiped the drawer clean

Organizing the Drawer

1. Arranged the file folders. In keeping this file divided into three sections, I placed each file folder into one of these three piles:

a. Structure of the house – windows, roof, shower units, etc.

b. Décor of the house – paint, ceiling fans, lighting, etc.

c. Products of the house – electronics, toys, jewelry, etc.

2. Combined file folder content. When I found similar products, I joined them into one category. For example, I placed the files for the lawnmower, edger, and weed whacker into one lawn equipment file folder.

3. Labeled each file folder. In keeping it simple, I wrote the category name on the label of the file folder. As I need items from this file, I can read the labels to quickly find the folder I need.

4. Returned folders to cabinet. With the sections organized and labeled, I placed them back into the filing cabinet. I used hanging file folders to divide the file folders into sections.


Cleaning Up

1. Trashed the unused file folders

2. Placed the outdated warranty pile in the To Be Shred box

3. Put away the pen and extra file folders

Instead of an overflowing heap of papers, I can open this drawer and find the document I need – with room to spare. In using time wisely for about 2 hours, I purged, cleaned, and organized my warranty file. For me, this was time well-spent.

As you find outdated systems, like overflowing paperwork, schedule time to purge, clean, and organize. Using time wisely can get you from “Oh, My!” to “Oh, yes!” Happy organizing!

Question: Where do you keep your warranty paperwork? Please add your answer to the comments.

Filed Under: Cleaning, Household, Organizing Tagged With: cleaning, organizing, purging

Organizing: Kitchen Drawers – Part 2 of 2

January 2, 2012 by Tracy

Guess I left you hanging on my kitchen drawer organization project. Sorry about that. 🙁 Since some of my favorite posts did not make the Top 10 List of 2011, I chose to include a preview day which trumped this second posting of this short series.

Though you had my steps to get from chaos to order, I know you are waiting for the before and after pictures. Yes, my house is lived in, gets dirty and disorderly, but it gets cleaned and organized.

If you are dealing with out-of-control clutter, then take it one room at a time. Work a little each week on one section of that room. Your progress might be slow, but don’t give up or get distracted. Just concentrate on brightening that corner. You will gain momentum as you make progress. Just carve out 15 minutes a week and go.

Drawer #3

On the day I organized drawers 1 and 2, I also cleaned out drawers 3 and 4. This third drawer houses utensils that are necessary, but not used daily.


Before Organizing                                  After Organizing

As the resident “junk” drawer with Box Top labels, Kraft Singles wrappers, and other small miscellaneous items, I began whipping this drawer into shape by:

1. Pulling out all the utensils and putting them on the counter

2. Sorting the items into piles

3. Wiping out the drawer

4. Replacing the drawer liner

5. Placing similar items together in the drawer

6. Giving each utensil a home

7. Putting away the remaining items that did not belong in this drawer

8. Examining the organized and now clutter-free kitchen drawer

Drawer #4

This drawer is in a row of three drawers. The first two drawers were clean, organized, and working well. However, this bottom drawer was crammed full and needed decluttering.


Before Organizing                            After Organizing

Once again I followed the above eight steps and removed lots of excess and unused items from this drawer.  When I replaced the needed items back in the drawer, I was left with room for all the straws, Box Tops labels, and Kraft Singles wrappers. 🙂

Leftover Items from Drawer #3 for Drawer #4

The rest of the items were donated, trashed, or put away, i.e., the extra hand towels placed with the linens in my half bathroom downstairs.

Leftover items from Drawer #4

When all the extra items from these drawers were removed and the remaining items neatly organized in the drawers, I could easily find the utensil needed. No longer did I need to sift through the cutter. As I spent less than an hour to organize these four drawers, I rid our home of clutter while using time wisely. Now, I am ready to tackle more clutter in my home. Welcome January and 2012!

Question: What household organizational project are you choosing to start this week? Please add your answer to the comments.

Filed Under: Household, Organizing Tagged With: kitchen

Organizing: Kitchen Drawers – Part 1 of 2

December 12, 2011 by Tracy

As I went to my kitchen drawer for a cooking utensil and found a cluttered mess, I knew it was time for an organized makeover. After months of stashing unused or unknown items in my kitchen drawers, my valuable kitchen space was getting used by odds and ends. No more. I declared – time to take back my kitchen and rid these drawers of clutter.

Kitchen Drawer #1 - Before

Drawer #1

This drawer houses many of my spatulas, spoons, ladles, pizza cutters, and other kitchen utensils. Instead of all the similar items grouped together, all the utensils were just stashed in the drawer. After moving the items around to find the one utensil I needed, it was time to begin the reorganization.

    1. Pull out all the bulky utensils and put on the counter
    2. Sort the items into piles
    3. Wipe out drawer
    4. Replace the drawer liner
    5. Place similar items together in the drawer
    6. Give each utensil a home
    7. Put away the remaining items
    8. Enjoy the organized and now clutter-free kitchen drawer

Drawer #2

Kitchen drawer #2 - Before organizing

Once I began organizing one cabinet, the momentum began and I tackled a second drawer as well. This drawer was more of a mess. I still had all the plastic utensils from soccer season which was in (ahem) May. These drawers were overdue for a good reorganizing.

Once again I followed the above eight steps, and removed lots of excess and unused items from this drawer.  When I replaced the needed items back in the drawer, I was left with all these other items to put away, trash, or donate.

When all the extra items had been removed and the remaining items neatly organized in the drawers, I felt much better. I could see all the items without sorting through the clutter to find that serving utensil.

Kitchen Drawer #1 - After organizing

Kitchen drawer #2 - After organizing

The results were worth taking fifteen minutes to organize. In using time wisely, taking a few minutes to organize one drawer, cabinet, or shelf will give you momentum as you seek to start, continue, or keep your home organized.

Question: What household organizational project is on your agenda? Please add your answer to the comments.

Filed Under: Household, Organizing Tagged With: kitchen

Scheduling: Laundry Routine – Part 4 of 4

December 5, 2011 by Tracy

Photograph Credit: Flickr (BamaCIT)

I love the smell of clean laundry. In fact, I get asked often how I get our clothes smelling so good. You want to know my secret? You think I will share it with you? Yeah, I will. 🙂

It is a combination of a fragrance-free laundry detergent with Snuggle liquid fabric softener. Because the laundry detergent has no fragrance, the Snuggle permeates our clothing for a fresh, clean smell.

Before we get to clean-smelling clothing in our organized laundry routine, let’s review our first three steps: Preparing throughout the week, Pre-treating soiled clothing, and Preparing on laundry day. Today, I will complete this series with STEP FOUR.

STEP FOUR: Performing laundry tasks

To get the fresh, clean smell throughout our loads of laundry, I follow this routine:

Washing the Clothes

1. Use All Free and Clear detergent since my children have skin sensitivities which perfumed laundry detergent irritates.

2. Wash all loads on warm/cold, and all load sizes are large or super.

3. Add Snuggle liquid fabric softener during the rinse cycle to make the clothes smell great without irritating my children’s skin.

Drying the Clothes

1. Place one Snuggle fabric softener sheet into the dryer with the clothes to keep them static cling-free.

2. Pile the clean, dried clothes into one of two blue laundry baskets.

3. Remove the lent from the dryer vent.

Folding and Putting Away the clothes

1. Fold the clothes and place them back into the clean blue laundry basket.

2. Take the laundry basket upstairs.

3. Put the clothing in the appropriate dressers or closets.

The two blue rectangular baskets are for clean clothes. The oval blue basket and white basket are used for dirty or used clothes. Having different shaped and different colored baskets helps my family differentiate between clean and dirty clothes. Since my family knows which baskets are dirty and which ones are clean, I avoid getting questioned on whether items are clean or dirty. This system of using different baskets makes laundry days simple and organized.

As you work through laundry days at your home, I hope you will find a system that works for you while using time wisely. Whether you choose a weekend or weekdays to tackle your laundry pile, you can stay organized by preparing prior to laundry day, pre-treating soiled clothing, preparing on laundry day, and performing laundry tasks. Happy laundry organizing!

Question: Do you use different baskets for clean and dirty clothes? Please add your answer to the comments.

Filed Under: Laundry, Household, Scheduling Tagged With: laundry

Scheduling: Laundry Routine – Part 3 of 4

November 28, 2011 by Tracy

Photograph Credit: Flickr (remember everyday)

Though I prepare for laundry day throughout the week by checking to be sure that all clothing items are placed in a hamper or laundry basket, there are still items to prepare on laundry day before adding that first load to the washing machine.

Thus far in our series, we have looked at STEP ONE: Preparing throughout the week and STEP TWO: Pre-treating soiled clothing. Today, we will proceed to STEP THREE.

STEP THREE: Preparing on laundry day

While the soiled clothes continue to soak in the OxiClean solution, I prepare to begin the laundry by:

    • Gathering the laundry baskets and hampers and bringing them to my bedroom,
    • Sorting all the items into the dark or white baskets from my bedroom closet,
    • Choosing a load of laundry to wash, and
    • Carrying the basket with those clothes down to the washing machine.

Before starting the load of laundry, I will check the items soaking in the Oxiclean solution to see if any of those items can be added to this load of laundry. If I find some, then I will wring out those items and add them to the laundry basket before adding this load of laundry to the washing machine.

With all the items gathered, sorted, and assigned a load of laundry, I can quickly begin using time wisely to get my family’s clothing items washed, dried, and put away. Next week, I will complete this series with my system for performing the laundry task.

Question: Where do you sort your family’s clothing? Please add your answer to the comments.

Filed Under: Laundry, Household, Scheduling Tagged With: laundry

« Previous Page
Next Page »

Welcome to Using Time Wisely!


Presenting organizational tips and tricks to save you money, energy, and time.

To access 5 Ways to Using Time Wisely Today, click "like" on my facebook page and join in on the journey of Using Time Wisely.

Looking for something?

Email Newsletter

Sign up to receive email updates and to hear what's going on with us!

Copyright © 2026 · Lifestyle Pro Theme on Genesis Framework · WordPress · Log in