• Home
  • About Tracy
  • Contact Me

Using Time Wisely

Organized to save money, energy, and time

  • Email
  • Facebook
  • Pinterest
  • RSS
  • Twitter
  • YouTube
  • Document Organization
    • Overview
    • Box 1
      • Credit Report/Cards
        • Credit Reports
          • Credit Updates
          • Credit Scores
        • Credit Cards
      • Personal
      • Home Ownership
      • Vehicles
    • Box 2
      • Life Insurance
      • Major Medical
      • Tax-Favored Programs
      • Prescriptions
      • Dental & Vision
      • Special Health Policies
      • Short-term Disability
      • Long-term Disability
      • Personal Insurance
    • Box 3
      • Social Security Documents
      • Retirement
      • Investments
      • Estate Planning
      • Tax Records
  • Household
    • Cleaning
    • Maintaining
    • Organizing
    • Scheduling
      • Laundry
  • Event Planning
    • Assisting
    • Attending
    • Coordinating
      • Birthday Party
      • Christmas
      • Dinner Party
      • Fall Festival
      • Field Trip
      • Lemonade Stand
      • Thanksgiving
    • Learning
    • Preparing
    • Serving
  • Miscellaneous
    • Communication
      • Customer Service
      • E-mail
      • RSS Feed Reader
    • Goals
    • Organization
    • Time Management
      • To Do List
  • Food
    • Food Prep
    • Grocery Shopping
      • Lists
      • Pricing
    • Menu Planning
    • Recipes
    • Stockpile
  • Family Activities
    • Going Out
      • Free Outings
      • Inexpensive Outings
      • Summer
    • Rewards
      • Good Grades
      • Reading
      • Summer Reading
    • Staying at Home
  • Stretching Your Dollars
    • Daily Deals
      • Groupon
      • LivingSocial
    • Drugstores
      • CVS
    • Gas Prices
    • Gifts
    • On-line Shopping
    • Pictures
    • Products
    • Restaurants
    • School Items
    • Tips
You are here: Home / Archives for Household

Organizing: Stop and Do It!

November 4, 2013 by Tracy

Organizing: Stop and Do It!

Photograph Credit: Flickr (Josh Lowe)

I know it is fall, but I’m in spring cleaning mode. The brisk air has rejuvenated me. With my living room and dining room cleaned, I am concentrating on my kitchen.

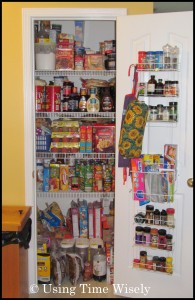
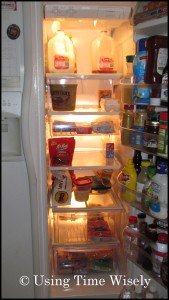
As I was organizing my pantry and consolidating to save space, I was adding items to my shopping list. If I found our supply low on an item, I jotted it down. As I make out my grocery lists, I will check the deals for the items on the list.

Having run out of garlic powder recently, I had placed the empty container on our counter to replenish. When organizing the pantry, I sorted through the extra spices and found a full container of garlic powder to substitute for the empty one.

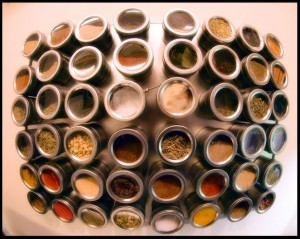
While rearranging and taking inventory, I found many of my spice containers on the rack less than half full. Since stopping to find a needed spice while cooking is not convenience, I try to always keep a backup of each spice I use.

I purchase spices in containers that usually don’t fit on the spice rack. So, I refill my small spice containers kept on the door of my pantry with the larger supply.

In using time wisely, I stopped cleaning and organizing to refill the spice containers to save time when cooking and needing those spices. I stopped because if I passed it, then I knew I would forget to come back. By stopping and doing, I got it done.

Now my spice containers are full, my pantry organized, and our products consolidated. With the pantry done, I’m on to more cleaning and organizing in the kitchen to get my home in order before the holidays.

As I come to a project that needs to get done, I will stop and do it! Getting it done is another item off my to-do list and saves me time later. 😉 Happy organizing!

Question: What do you do when you get to a project in the middle of another project?

Filed Under: Household, Maintaining, Organizing Tagged With: organizing

Organizing: Consolidating to Save Space

October 28, 2013 by Tracy

Organizing: Consolidating to Save Space

Organizing: Consolidating to Save SpaceEntering a different phase of our family life, I am adjusting to my children’s growing independence. They are becoming more dependable and taking on more responsibilities. With their new ventures, I am adjusting to the growing pains.

One such pain is my pantry. Feeling like I just organized my pantry, I was a bit disheartened when I found empty boxes, items on shelf 3 that should be on shelf 4, and 2 opened boxes of the same cereal.

Though I really want to fuss as I spend my time organizing the pantry and I saw my efforts fleeting, I was glad I was alone in the kitchen.

Yes, alone in the kitchen without someone at my feet. Actually, I was alone in the house as Miss 3 was spending the day with her Grandparents while the older two were at school.

Realizing that the reason for the added inconvenience was a good thing, I calmed down. Wanting to have responsible children does not come without side effects.

If I need to organize my pantry more often because my children forget or just put an item where they think it goes, then that is a small price to pay for the amount of responsible practice they are getting.

In working through my pantry, I found that this organizing session needed consolidating to save space.

Consolidating Multiple Opened Packages

As I emptied and organized my pantry shelf by shelf, I found the following items having multiple opened packages:

    • 2 boxes of oatmeal packages
    • 2 boxes of pop tarts
    • 2 boxes cracker snacks
    • 2 bags of sour cream and onion chips
    • 2 bags of chocolate chips
    • 2 boxes of Rice Krispies

In addition to the multiples, I found two empty boxes that held granola bars and cracker packs which I removed. Then I consolidated the multiple opened items into one package each. Adding those empty packages to the trash, I freed up quite a bit of space.

Consolidating Snacks

Organizing: Consolidating to Save SpaceWith my children eating 2 to 3 snacks a day, I keep an assortment of fruits, vegetables, yogurt, crackers, and granola bars available.

As the boxes are opened and the items begin to disappear, I find stray packages of snacks throughout the pantry.

To save space and keep all the items together, I consolidate the miscellaneous snacks into one large Ziploc bag. This is the bag I take on field trips, outings, and errand runs.

Since I never know how long we might end up waiting or if someone forgets a snack, we have sustenance and extras to share.

As I adjust to this new and exciting phase of our family, I am learning more patience as processes I have practiced for years are getting invaded. I am happy to share this space to help my children learn, but I will need to watch it more carefully.

With little reminders and upkeep, I can use the contents of our pantry to teach my children how to develop their growing independence. Working with them will take time, but the investment will be worth the time and energy. Happy teaching through organizing!

Question: How are you teaching when your system gets disrupted?

Filed Under: Household, Organizing Tagged With: organizing

Cleaning: Oh, I Wonder What That Was?

October 21, 2013 by Tracy

Cleaning: Oh, I Wonder What That Was?

Cleaning: Oh, I Wonder What That Was?For the most part, we clean up as we go around our house. If we see a mess, then we will stop to clean it. However, there are messes that we don’t see until something else gets moved. At that time, I might let out an, “Oh, I wonder what that was?”

One such moment occurred before I went grocery shopping. While the refrigerator was bare, I noticed a thin layer of a substance on one of our shelves. Upon further investigation, I found the mess sticky and pale in color. Ick!

Not sure how long that mess had been there, I decided to just clean the refrigerator. I find it easier to clean when the contents are minimal, so I wanted to complete this project before going to the store. My process was as follows:

1. Fill a bowl full of warm soapy water

I use a large plastic bowl and a few drops of liquid dishwashing detergent. This bowl remains in the sink, so I can go back and forth to clean each shelf.

2. Take out the items on the top shelf

As I put each item from the top shelf onto the counter, I wipe down each item. This is because I don’t want any residue on these items to dirty my clean shelf. (Visions come flooding back of spending time cleaning only to find more mess than when I started from the smudged jug of milk back on the shelf. Yep, it happened.)

3. Wipe down the shelf and the surrounding area

Cleaning: Oh, I Wonder What That Was?In addition to wiping down the shelf with warm soapy water, I also clean the walls and the rear of the refrigerator while the space is clear.

4. Continue cleaning shelf by shelf

If the shelf is removable, then I take it out and clean the track as well. I’m amazed at what appears to be clean can be so dirty and sticky when the shelf is lifted.

5. Remove drawers

Each drawer is removed, emptied, and wiped clean. I also wipe down the track to remove any crumbs or unwanted substances. As I remove the bottom drawer, I am always amazed at the crumbs collected on the floor of our refrigerator. Yuck!

6.  Clean the shelves on the door

If I have time, I also like to remove the items in each compartment on the door. Surprisingly, these areas stay clean. Wiping them down is quick and easy.

7. Pop off and dust the vent

The last item I like to clean is the vent located on the bottom of our refrigerator. On our side-by-side unit, I must open both the refrigerator and the freezer doors to pop off the vent. This bar gets dirty as it collects dust both on the inside and outside. I also dust off the hoses and other parts hidden behind the vent.

Keeping the vent clean keeps our refrigerator operating more efficiently. Without working harder to ventilate the air, the refrigerator circulates the air and keeps our food cool. I really need to clean this vent more often.

Though cleaning the refrigerator is not the highlight of my day, I like to have the project done. By cleaning as we go, this particular cleaning took less than an hour. Now, I did not clean the freezer, but the refrigerator was done.

In using time wisely, I find cleaning when our food supply in the refrigerator is low results in the best use of my time. Taking out lots of containers and items eats up my time. So, with a small amount of items to remove, I can complete the process in less time. Hope your cleaning projects are coming along.

I am enjoying the smell of our pumpkin candle as I finished a top to bottom cleaning of our living room. I am off to work on our dining room. One step at a time and one project at time is how I roll. Hopefully, I won’t find more messes that have me saying, “Oh, I wonder what that was?” Happy cleaning!

Question: What current cleaning project is on your to-do list?

Filed Under: Cleaning, Household Tagged With: cleaning, refrigerator

Organizing: Art Supplies

October 14, 2013 by Tracy

Organizing: Art Supplies

Organizing: Art SuppliesMy 6-year-old jumps from craft to craft. My mom was so helpful this summer with project ideas to keep her interested and busy.

Though I enjoy some crafts, Miss 6 enjoys all things creative. Thankfully, our dollar store carries a large number of diverse crafts that kept her busy.

She painted by number, created sticker mosaics, worked with beads, painted magnets, and colored velvet.

With partial projects done and leftover supplies for additional crafts, our art supplies were overflowing from their designated container.

Organizing: Art Supplies

When that happens, it is time to organize or re-organize. This project took less than half an hour and was worth the investment of time.

Organizing: Art SuppliesRemove all Items

The first step was to remove all the items from the craft box and gather any miscellaneous items that would not fit within the box.

Purge Items

I then tossed trash, removed extra packaging, and removed old or unusable items from the supplies.

Sort the Items

With my table full of paint, stickers, and markers, I began sorting like items together. I chose to sort by project (e.g., paint, markers, stickers, etc.).

Organizing: Art SuppliesConsolidate the Items

We had lots of stickers leftover from projects. I tossed the packaging and put all the extra pieces in a sandwich-size baggie which saved space. I repackaged similar items to make accessing them easier.

Organize the Items

Putting the items back into the space, I put like items together and used containers to compartmentalize different projects. I had a large box that held ready-to-do crafts.

Return Box to Shelf

With all the items organized and put back into the space, I had filled the container without an overflow.

During this fall as the rain and cooler temperatures drive us inside, I am prepared to give Miss 6 craft projects to promote her creativity and need for expression. Part of the fun is discovering new projects to do with the available supplies.

As seasons and interests change, I am always finding something new to organize or re-organize. Keeping up with the changes as they occur allows me to nip these projects when they are small. If I let the situation continue, then I will need to invest lots of time to get the project organized.

In using time wisely, I try to organize at least one box, shelf, drawer, cabinet, or closet each week. For me, there is always something we have outgrown or can better use, so I love the challenge. Having this art supply project complete just makes me smile. Happy organizing!

Question: What is a current area that your family has outgrown that needs organization? 

Filed Under: Household, Organizing Tagged With: decorating

Decorating: Hanging Wall Art – Part 3 of 3

October 7, 2013 by Tracy

Decorating: Hanging Wall Art - Part 3 of 3

Decorating: Hanging Wall Art - Part 3 of 3Getting wall art from the box to the wall is a process for me. I tend to take my time and get it right. Once in place, items stay for years.

Our living room wall arrangements have seen one change in six years. That change was swapping our large mirror for a flat panel television. The pictures, frames, and decorations have remained the same.

Since I do not change my mind often, I do not just slap items on the wall. I take my time – as you have learned through this short series.

In part one, I experimented with my wall art, and in part two, I sketched my wall art. Now, it is time to hang my wall art.

Step Three: Hang the Wall Art Arrangement

After working at my desk with the sketch of my wall art arrangement hung on the wall, I wait until I know that this arrangement will work. Then, I ask for help because it lands on my husband’s “honey-do” list.

When he is available, he gathers his tools: stud finder, charged drill, and hardware. Placing all the items that need to be hung on my desk, he gets to work hanging the wall art in place:

1. Decorating: Hanging Wall Art - Part 3 of 3Checks Wall Placement

He uses the stud finder to determine where the main posts are in the wall before he drills holes.

2. Gets Hardware

For this arrangement, the shelf and the magnetic board came with hardware. Paul retrieved 4 more screws for the block prints.

3. Drills Holes

Using the poked holes in the paper, Paul drills holes into the wall and removes the screws. He does this for each hole marked on the paper.

4. Removes Paper

With the paper removed, the wall reveals the holes where the screws need to go.

5. Adds Hardware

Learning from a contractor, who repaired our bedroom closet when the wiring shelving fell off the wall, Paul uses wall anchors to stabilize the wall art. He places the wall anchor into the hole. Then he screws in the hardware for a firm fit.

6. Hangs Wall Art

With the hardware in place, Paul hangs each wall art item for a perfect placement.

In using time wisely, I take a few minutes each day for a week or two to plan this project. When I need the help, Paul can accomplish this task efficiently and without needing someone to “see” if the art work is level or off-center. Though it takes more time to plan than just sticking it up on the wall, I am very happy with the result and will admire this wall art arrangement often.

As you decorate your home and hang items on the wall, planning ahead will save you from rearranging or finding that one item is higher than another when installed. You might need to wait a few days, but the wait will be worth it once you see your vision on the wall. Happy decorating!

Question: What are your hanging wall art tips?

Filed Under: Decorating, Household Tagged With: decorating

« Previous Page
Next Page »

Welcome to Using Time Wisely!


Presenting organizational tips and tricks to save you money, energy, and time.

To access 5 Ways to Using Time Wisely Today, click "like" on my facebook page and join in on the journey of Using Time Wisely.

Looking for something?

Email Newsletter

Sign up to receive email updates and to hear what's going on with us!

Copyright © 2025 · Lifestyle Pro Theme on Genesis Framework · WordPress · Log in