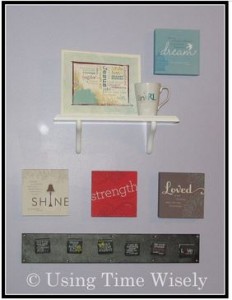
 Getting wall art from the box to the wall is a process for me. I tend to take my time and get it right. Once in place, items stay for years.
Our living room wall arrangements have seen one change in six years. That change was swapping our large mirror for a flat panel television. The pictures, frames, and decorations have remained the same.
Since I do not change my mind often, I do not just slap items on the wall. I take my time – as you have learned through this short series.
In part one, I experimented with my wall art, and in part two, I sketched my wall art. Now, it is time to hang my wall art.
Step Three: Hang the Wall Art Arrangement
After working at my desk with the sketch of my wall art arrangement hung on the wall, I wait until I know that this arrangement will work. Then, I ask for help because it lands on my husband’s “honey-do” list.
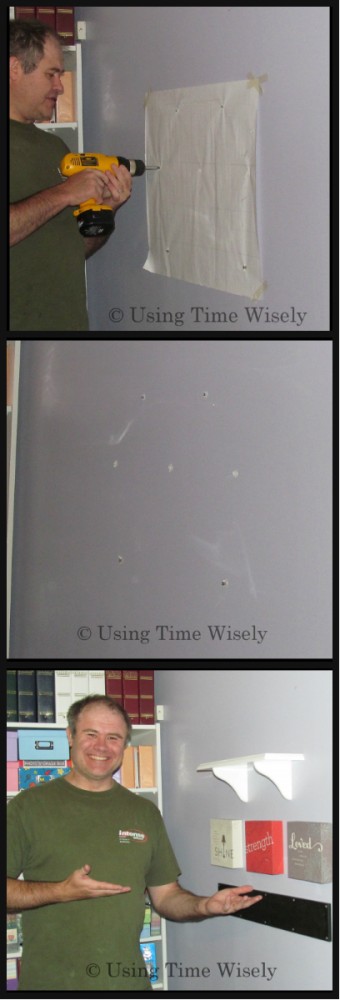
When he is available, he gathers his tools: stud finder, charged drill, and hardware. Placing all the items that need to be hung on my desk, he gets to work hanging the wall art in place:
1.  Checks Wall Placement
He uses the stud finder to determine where the main posts are in the wall before he drills holes.
2. Gets Hardware
For this arrangement, the shelf and the magnetic board came with hardware. Paul retrieved 4 more screws for the block prints.
3. Drills Holes
Using the poked holes in the paper, Paul drills holes into the wall and removes the screws. He does this for each hole marked on the paper.
4. Removes Paper
With the paper removed, the wall reveals the holes where the screws need to go.
5. Adds Hardware
Learning from a contractor, who repaired our bedroom closet when the wiring shelving fell off the wall, Paul uses wall anchors to stabilize the wall art. He places the wall anchor into the hole. Then he screws in the hardware for a firm fit.
6. Hangs Wall Art
With the hardware in place, Paul hangs each wall art item for a perfect placement.
In using time wisely, I take a few minutes each day for a week or two to plan this project. When I need the help, Paul can accomplish this task efficiently and without needing someone to “see” if the art work is level or off-center. Though it takes more time to plan than just sticking it up on the wall, I am very happy with the result and will admire this wall art arrangement often.
As you decorate your home and hang items on the wall, planning ahead will save you from rearranging or finding that one item is higher than another when installed. You might need to wait a few days, but the wait will be worth it once you see your vision on the wall. Happy decorating!
Question: What are your hanging wall art tips?
My apartment living room is in dire need of art work
David Ryan recently posted..trading comparison info
Your comment made me laugh, David. When I was in grad school, I had apartment mates. My immediate roommate and I disliked the bare walls, so we checkout artwork at our local library. If we really liked a piece, we took turns checking it out or renewing it to keep it longer.
It was a free option that worked as we did not need the artwork for long (only 2 school years), and the new change every few weeks was nice. It is not a permanent solution, but it made our space ours without bare walls.
Thanks for the comment. It brought back some really great memories. I hope you might have access to some free art at your library as well. 🙂