We have reached my favorite part of the process: clean up. When I am in the midst of a project, I spread out and the clutter explodes before the project is complete. It really does get worse before it gets better when I am organizing. However, the final product is so worth the few days of disaster.
In organizing my children’s clothing, I have addressed preparing (Step 1), purging (Step 2), packing (Step 3), and placing (Step 4). The final step is preserving the unused items for another time.
STEP FIVE: Preserve
By the time I have placed all the “new” items in the closet and dresser, I am ready to clean up my upstairs hallway and return it to a clean, empty space.
Though I am the one who organizes the clothing items, my husband is definitely involved. Just need to give a shout out for my fabulous hubby. He helps move the totes to and from storage, label the totes, and pack up the donation items. What a great guy! 🙂
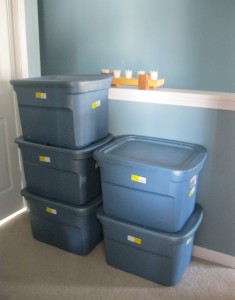
Filled Totes
All the filled totes remain stacked in the hallway until the laundry is complete. As I fold the loads of laundry, I check to be sure I have packed away all smaller-sized clothing. When the laundry is complete and all the items have been added to the correct tote, I will let Paul know that I am finished with those totes. He will check to be sure all totes are labeled, carry them to our storage closet, and place them on the shelves.
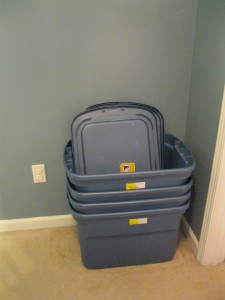
Empty Totes
Usually I will have a couple of empty totes from the clothing I am currently using. The empty totes are stacked and ready to be taken to the garage and added to the empty storage totes. When I organize the clothing again in the spring, I can locate these labeled totes to refill.
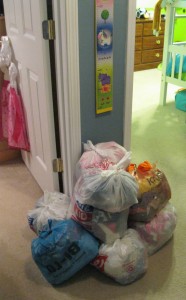
Donations
All the items in the donation pile are packed in plastic bags and taken to the garage. Usually the items stay in the garage until I plan a trip to the donation container. But now that we have a neighbor with children younger than my three, Paul delivered all the bags to them. This situation was a win-win situation since they could use the items, we did not need to store the bags, and I did not need to make a trip to the donation center.
Car
With the newer clothing available, I chose one outfit complete with socks, shoes, and a diaper, packed these in a bag, and placed them in the trunk of the car. You never know when you (or someone you know) will need that extra outfit.
Supplies
As Paul moves the totes to their locations, I gather up the remaining supplies (i.e., sharpies, labels, plastic bags, etc.) and return them to their home. I then dust the hallway ledge and run the vacuum.
At the end of my five-step process, the smaller-sized clothing is out of sight, the new-sized clothing is clean and placed in the closet and dresser, and the room and hallway are clean. The project takes a few days to complete with lots of interruptions in between, but the final product is worth the time spent organizing my children’s clothing.
As you continue using time wisely, remember to break your project into small segments that can be completed in short amounts of time. By plugging away a little here and there, you will be thrilled with your final product. Keep up the great work as you continue organizing!
Question: Where do you store your children’s clothing? Please add your answer to the comments.


