• Home
  • About Tracy
  • Contact Me

Using Time Wisely

Organized to save money, energy, and time

  • Email
  • Facebook
  • Pinterest
  • RSS
  • Twitter
  • YouTube
  • Document Organization
    • Overview
    • Box 1
      • Credit Report/Cards
        • Credit Reports
          • Credit Updates
          • Credit Scores
        • Credit Cards
      • Personal
      • Home Ownership
      • Vehicles
    • Box 2
      • Life Insurance
      • Major Medical
      • Tax-Favored Programs
      • Prescriptions
      • Dental & Vision
      • Special Health Policies
      • Short-term Disability
      • Long-term Disability
      • Personal Insurance
    • Box 3
      • Social Security Documents
      • Retirement
      • Investments
      • Estate Planning
      • Tax Records
  • Household
    • Cleaning
    • Maintaining
    • Organizing
    • Scheduling
      • Laundry
  • Event Planning
    • Assisting
    • Attending
    • Coordinating
      • Birthday Party
      • Christmas
      • Dinner Party
      • Fall Festival
      • Field Trip
      • Lemonade Stand
      • Thanksgiving
    • Learning
    • Preparing
    • Serving
  • Miscellaneous
    • Communication
      • Customer Service
      • E-mail
      • RSS Feed Reader
    • Goals
    • Organization
    • Time Management
      • To Do List
  • Food
    • Food Prep
    • Grocery Shopping
      • Lists
      • Pricing
    • Menu Planning
    • Recipes
    • Stockpile
  • Family Activities
    • Going Out
      • Free Outings
      • Inexpensive Outings
      • Summer
    • Rewards
      • Good Grades
      • Reading
      • Summer Reading
    • Staying at Home
  • Stretching Your Dollars
    • Daily Deals
      • Groupon
      • LivingSocial
    • Drugstores
      • CVS
    • Gas Prices
    • Gifts
    • On-line Shopping
    • Pictures
    • Products
    • Restaurants
    • School Items
    • Tips
You are here: Home / Archives for cleaning

Cleaning: Deodorizing my Garbage Disposal

July 16, 2012 by Tracy

Deodorizing my Garbage Disposal

Photograph Credit: Flickr (Brian Short)

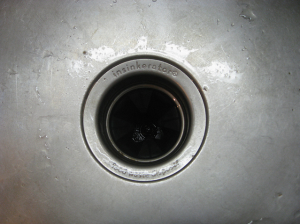
Oh, how I appreciate my garbage disposal! Yes, that hole in my sink that takes all the leftovers and unwanted particles and chomps them away. In using time wisely in the kitchen, my disposal is a time saver.

Having lived without one growing up and in the early years of our marriage, I know the convenience my garbage disposal provides.

While keeping my garbage disposal uncluttered, maintained, and cleaned, I follow these 8 steps to deodorizing my garbage disposal:

1. Fill an ice cube tray with white vinegar and place in freezer.

Tracy’s Tip: Mark this ice cube tray and only use it for freezing vinegar. 🙂 I wrote the word “vinegar” on my ice cube tray, so that I do not accidentally use it for water ice cubes.

Though I do not use ice cube trays often, I do keep some for those events that need decorative ice cubes (e.g., fruit in ice, mint in ice, etc.). To prevent unwanted vinegar at an event, I keep this ice tray with my cleaning supplies.

2. Remove the tray from the freezer when frozen.

Tracy’s Tip: Try to freeze and use the vinegar ice cubes on the same day. The vinegar aroma remains in the freezer for a few hours to 2 days when freezing the same day.

3. Run cold water in the sink.

4. Turn on the garbage disposal.

5. Crack the ice tray into the garbage disposal.

6. Allow the disposal to “eat up” all the ice cubes.

7. Turn off the garbage disposal.

8. Turn off the water.

For more options to cleaning and deodorizing your garbage disposal, How To Clean Stuff recommends dish soap and citrus or baking soda, to name a few.

Around the blogosphere, many suggest using baking soda to deodorize your garbage disposal, even professional plumbers. However, if you have plastic pipes, do not use baking soda with boiling water or after using a commercial drain cleaner. Per Earth Easy, you may melt your plastic pipes or create toxic fumes.

In applying these 8 steps, your garbage disposal will smell fresh. Cleaning and deodorizing your garbage disposal maintains your time-saving investment while using time wisely. Happy cleaning!

Question: How do you deodorize your garbage disposal? 

Filed Under: Cleaning, Household Tagged With: cleaning

Cleaning: Creating Motivation through the Sense of Smell

July 2, 2012 by Tracy

Photograph Credit: Yankee Candle

As I dusted, wiped, and scrubbed my entire downstairs last week, I lost steam around Wednesday morning. My arms, shoulders, and upper back were sore from all the labor, and I was only about a third of the way done. Yikes!

Though my husband noticed the clean smell when he came through the door, I became accustomed to the smell and felt tired and unmotivated. As I sought for an easy task to get moving, I decided to switch my spring candle with my summer candle.

When I lifted the lid, the aromatic power of the pineapple cilantro ignited my senses, and I was off to light the candle. As the sweet smell permeated my home, I gained energy and strength and got to work.

On Thursday, I continued to work and as I finished on Friday, I kept coming back to my favorite summer scent, the pineapple cilantro candle from Yankee Candle (which rarely goes on sale). For me, this candle created motivation through the sense of smell.

When I lack energy and that walk or exercise routine fails to spur my motivation, I turn to my favorite scents to get moving. This little refreshment spurs me on to completion.

Tracy’s Tip: I keep a sweet-smelling soy candle on my desk upstairs. As I am paying bills and scheduling items, I periodically take a break, inhale a deep breath, smell my candle, and continue with my project.

As you hit a slump with your ongoing projects, surround yourself with your favorite scents to create motivation through the sense of smell. Happy refreshment!

Question: What is your favorite summer candle scent?

Filed Under: Cleaning, Household Tagged With: cleaning

Purging, Cleaning & Organizing: Warranty File

January 9, 2012 by Tracy

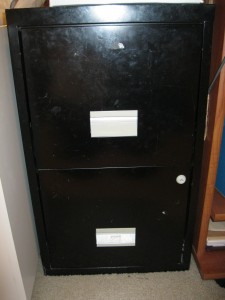
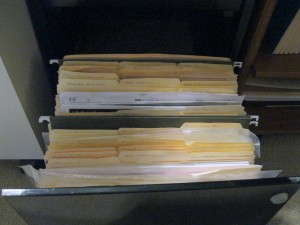
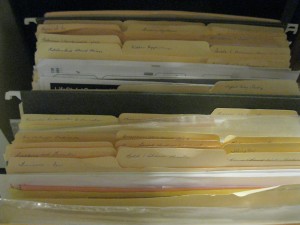
After sorting through all the paperwork from all the new electronics, gadgets, and toys, I went to add the documents to our warranty file, housed in a two-drawer filing cabinet. When I opened the bottom drawer, I found the file stuffed and in need of purging, cleaning, and organizing. Oh, my!

Seriously . . . it was a mess.

In case you are wondering about this file, the outside is usually covered with magnets which my girls enjoy putting on and taking off while I work at my desk. See the little finger prints all over the outside. 🙂 But inside, it holds all the documentation and receipts from purchases that carry a guarantee.

In using manila file folders, I label each folder with the type of documentation, e.g., phones, tools, appliances, furniture, etc. Over time, we replace items, donate, trash, or use the items.

Periodically, this file needs purging of obsolete items to keep the folder contents current. I think my “periodically”  extended a few years on this file because I found expiration dates from 2004.

I told you it was a mess.

In working on this project, I spent about 2 hours from purging to cleanup with a wonderful result.

Purging the Drawer

1. Gathered my supplies. After deciding to purge this file, I got the new documents, a pen, and manila file folders.

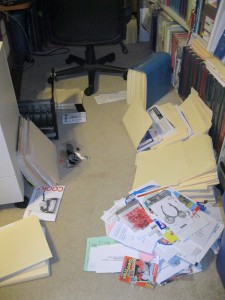
2. Purged each file. Removed one folder at a time and reviewed the contents. When I found paperwork for items we no longer have, I placed them in a trash pile (bottom right pile in picture below). The documents for items we are using were kept in the file.

3. Emptied the entire drawer. Taking out one file at a time, I worked through each file until the drawer was empty.

Cleaning the Drawer

1. Dusted the file drawer

2. Removed shreds of paper

3. Wiped the drawer clean

Organizing the Drawer

1. Arranged the file folders. In keeping this file divided into three sections, I placed each file folder into one of these three piles:

a. Structure of the house – windows, roof, shower units, etc.

b. Décor of the house – paint, ceiling fans, lighting, etc.

c. Products of the house – electronics, toys, jewelry, etc.

2. Combined file folder content. When I found similar products, I joined them into one category. For example, I placed the files for the lawnmower, edger, and weed whacker into one lawn equipment file folder.

3. Labeled each file folder. In keeping it simple, I wrote the category name on the label of the file folder. As I need items from this file, I can read the labels to quickly find the folder I need.

4. Returned folders to cabinet. With the sections organized and labeled, I placed them back into the filing cabinet. I used hanging file folders to divide the file folders into sections.


Cleaning Up

1. Trashed the unused file folders

2. Placed the outdated warranty pile in the To Be Shred box

3. Put away the pen and extra file folders

Instead of an overflowing heap of papers, I can open this drawer and find the document I need – with room to spare. In using time wisely for about 2 hours, I purged, cleaned, and organized my warranty file. For me, this was time well-spent.

As you find outdated systems, like overflowing paperwork, schedule time to purge, clean, and organize. Using time wisely can get you from “Oh, My!” to “Oh, yes!” Happy organizing!

Question: Where do you keep your warranty paperwork? Please add your answer to the comments.

Filed Under: Cleaning, Household, Organizing Tagged With: organizing, purging, cleaning

Cleaning: Microwave Oven

September 26, 2011 by Tracy

Photograph Credit: Flickr (Bella)

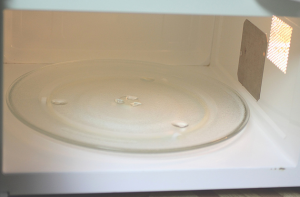
Keeping the microwave oven wiped down and clean is an on-going task. Knowing that 1 minute now saves 5 minutes later, I try to keep messes at bay by wiping up messes before they dry.

Though I am not the only one who uses the microwave in my home, I do, on occasion, choose to leave a mess. There are times when soothing a hurt finger or changing a diaper takes precedence over cleaning the microwave. 🙂

When I find a baked-on mess, here’s my simple solution:

1. Take a glass measuring cup and add about 2 cups of water.

2. Place the measuring cup with water into the microwave.

3. Zap the water for 5 minutes on high.

4. At the end of 5 minutes, allow the water to remain in the microwave for an additional 2 minutes.

5. Carefully, remove the hot measuring cup.

6. Using a sponge or rag, wipe down the microwave.

In using time wisely, I can put on the water while wiping down the counters and loading the dishwasher. This cleaning method not only results in a clean microwave, but it also saves me money (no cleaning solutions), energy (no scrubbing), and time (just wiping out the mess without working at it). If your microwave needs a cleaning, try heating water and wiping away the mess. The results are worth it. Happy cleaning!

Question: What is your best tip for cleaning the microwave oven? Please add your answer to the comments.

Filed Under: Cleaning, Household Tagged With: cleaning

Cleaning: Use Both Hands

July 25, 2011 by Tracy

Photograph Credit: Flickr (atf300)

Have you ever considered how you clean? If someone asked me this question, my response would be: “Yes, I clean top to bottom and right to left.” But after watching someone else clean, I will now add to my previous answer, “with both hands.”

My Observation

Recently, I had the opportunity to observe someone clean a store’s glass windows. These windows were rather tall, and the washer was concentrating on the lower half. She kept her right hand busy with all these tasks:

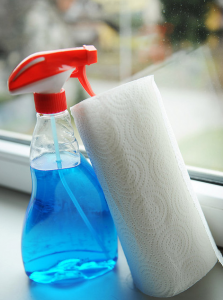
  • picking up the glass cleaner bottle from her cart,
  • spraying the glass,
  • placing the glass cleaner bottle back in the cart,
  • picking up the squeegee, and
  • working the squeegee in a zigzag motion from the middle of the pane to the floor.

Though her right hand was busy, she kept her left hand on her hip without utilizing it. I kept waiting to see if she would switch hands, but she did not. She was not in any rush, for she would stop to watch customers and to rest her right arm. (That right arm must have been quite tired.)

My Response

While watching her, I was thinking how this process could be improved to use her time wisely with the least amount of effort. These are my tips:

1. Use both hands. Hold the cleaner in one hand and the squeegee in the other. When one shoulder, arm, or hand gets tired, switch those products to the other hand.

2. Stay focused. Look at the window and keep working. As you complete a section, begin the next.

3. Continue to work from top to bottom. If you start at the bottom, you will likely need to re-do some or the entire lower portion when you clean the top.

Though I do not anticipate cleaning tall windows anytime soon, I will be emptying out my dishwasher, putting away folded laundry, and stacking grocery items in my pantry. So, as I accomplish these household tasks, I plan to use both hands, stay focused, and continue to work from top to bottom.

Question: What tips or tricks have you discovered from watching someone clean well or poorly? Please share your answer by clicking the Leave a Comment link below.

Filed Under: Cleaning, Household Tagged With: cleaning

« Previous Page
Next Page »

Welcome to Using Time Wisely!


Presenting organizational tips and tricks to save you money, energy, and time.

To access 5 Ways to Using Time Wisely Today, click "like" on my facebook page and join in on the journey of Using Time Wisely.

Looking for something?

Email Newsletter

Sign up to receive email updates and to hear what's going on with us!

Copyright © 2025 · Lifestyle Pro Theme on Genesis Framework · WordPress · Log in