 My stockpile currently holds 6 bags of sugar – in addition to other types of baking supplies and food. As I store my stockpile in our garage, the bags of sugar get hard.
Finding that adding moisture to the air in our microwave makes cleaning easy, I decided to try adding the bag of sugar within that same atmosphere.
If I were a student, then this experiment would probably be my science fair project.
Instead of How to Soften a Bag of Hard Sugar, my hypothesis would be Adding Moisture in the Air will Soften a Bag of Hard Sugar. Since my experiment worked, I am glad to report the results.
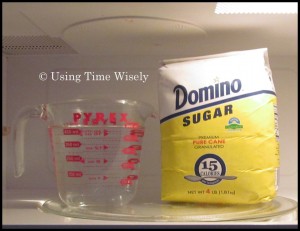
How to Soften a Bag of Hard Sugar
1. Fill a glass measuring cup with 2 cups of water.
2. Heat the water in the microwave for 5 minutes.
3. Let rest for 2 minutes as the steam fills the microwave’s interior.
4. Open the bag of sugar from the top.
5. Quickly open the microwave door and insert the opened bag of sugar.
6. Close the microwave door.
7. Heat the sugar and water for 1 minute.
8. Let rest for 1-2 minutes as the steam softens the sugar.
9. Remove the bag of sugar and feel the softness by squeezing the bag.
10. If the bag is still hard, repeat steps 7-9.
More than Just a Bag of Sugar
In addition to bags of sugar and brown sugar, this method also works to soften bread. We add moisture to our microwave before heating leftover pizza, breadsticks, corn bread, and biscuits. With the added moisture, the bread perks up and is soft to eat.
Though no science fair projects are on our horizon, I still enjoy experimenting to finding solutions to issues around our home. Solving the dilemma of how to soften a bag of hard sugar frees me from worrying about the sugar getting hard in the garage.
Without worry, I am better able to use time wisely keeping up with other tasks, like laundry. 😉 Happy experimenting!
Question: What experiments have you tried?