• Home
  • About Tracy
  • Contact Me

Using Time Wisely

Organized to save money, energy, and time

  • Email
  • Facebook
  • Pinterest
  • RSS
  • Twitter
  • YouTube
  • Document Organization
    • Overview
    • Box 1
      • Credit Report/Cards
        • Credit Reports
          • Credit Updates
          • Credit Scores
        • Credit Cards
      • Personal
      • Home Ownership
      • Vehicles
    • Box 2
      • Life Insurance
      • Major Medical
      • Tax-Favored Programs
      • Prescriptions
      • Dental & Vision
      • Special Health Policies
      • Short-term Disability
      • Long-term Disability
      • Personal Insurance
    • Box 3
      • Social Security Documents
      • Retirement
      • Investments
      • Estate Planning
      • Tax Records
  • Household
    • Cleaning
    • Maintaining
    • Organizing
    • Scheduling
      • Laundry
  • Event Planning
    • Assisting
    • Attending
    • Coordinating
      • Birthday Party
      • Christmas
      • Dinner Party
      • Fall Festival
      • Field Trip
      • Lemonade Stand
      • Thanksgiving
    • Learning
    • Preparing
    • Serving
  • Miscellaneous
    • Communication
      • Customer Service
      • E-mail
      • RSS Feed Reader
    • Goals
    • Organization
    • Time Management
      • To Do List
  • Food
    • Food Prep
    • Grocery Shopping
      • Lists
      • Pricing
    • Menu Planning
    • Recipes
    • Stockpile
  • Family Activities
    • Going Out
      • Free Outings
      • Inexpensive Outings
      • Summer
    • Rewards
      • Good Grades
      • Reading
      • Summer Reading
    • Staying at Home
  • Stretching Your Dollars
    • Daily Deals
      • Groupon
      • LivingSocial
    • Drugstores
      • CVS
    • Gas Prices
    • Gifts
    • On-line Shopping
    • Pictures
    • Products
    • Restaurants
    • School Items
    • Tips
You are here: Home / Archives for organizing

Organizing: Children’s Clothing – Part 5 of 5

October 31, 2011 by Tracy

We have reached my favorite part of the process: clean up. When I am in the midst of a project, I spread out and the clutter explodes before the project is complete. It really does get worse before it gets better when I am organizing. However, the final product is so worth the few days of disaster.

In organizing my children’s clothing, I have addressed preparing (Step 1), purging (Step 2), packing (Step 3), and placing (Step 4). The final step is preserving the unused items for another time.

STEP FIVE: Preserve

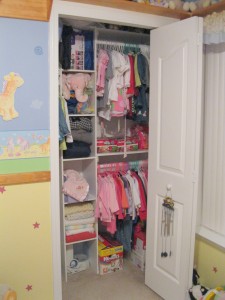
By the time I have placed all the “new” items in the closet and dresser, I am ready to clean up my upstairs hallway and return it to a clean, empty space.

Though I am the one who organizes the clothing items, my husband is definitely involved. Just need to give a shout out for my fabulous hubby. He helps move the totes to and from storage, label the totes, and pack up the donation items. What a great guy! 🙂
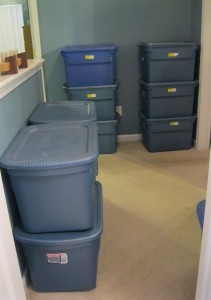
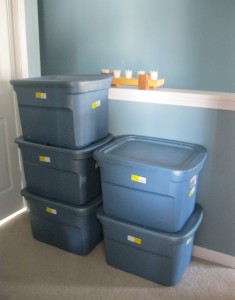
Filled Totes

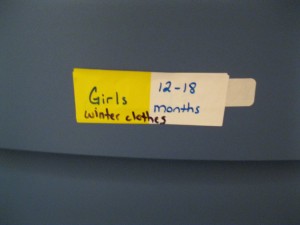
All the filled totes remain stacked in the hallway until the laundry is complete. As I fold the loads of laundry, I check to be sure I have packed away all smaller-sized clothing. When the laundry is complete and all the items have been added to the correct tote, I will let Paul know that I am finished with those totes. He will check to be sure all totes are labeled, carry them to our storage closet, and place them on the shelves.

Empty Totes

Usually I will have a couple of empty totes from the clothing I am currently using. The empty totes are stacked and ready to be taken to the garage and added to the empty storage totes. When I organize the clothing again in the spring, I can locate these labeled totes to refill.

Donations

All the items in the donation pile are packed in plastic bags and taken to the garage. Usually the items stay in the garage until I plan a trip to the donation container. But now that we have a neighbor with children younger than my three, Paul delivered all the bags to them. This situation was a win-win situation since they could use the items, we did not need to store the bags, and I did not need to make a trip to the donation center.

Car

With the newer clothing available, I chose one outfit complete with socks, shoes, and a diaper, packed these in a bag, and placed them in the trunk of the car. You never know when you (or someone you know) will need that extra outfit.
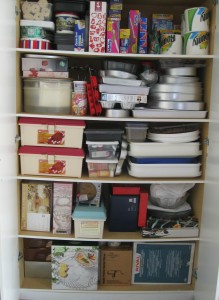
Supplies

As Paul moves the totes to their locations, I gather up the remaining supplies (i.e., sharpies, labels, plastic bags, etc.) and return them to their home. I then dust the hallway ledge and run the vacuum.

At the end of my five-step process, the smaller-sized clothing is out of sight, the new-sized clothing is clean and placed in the closet and dresser, and the room and hallway are clean. The project takes a few days to complete with lots of interruptions in between, but the final product is worth the time spent organizing my children’s clothing.

As you continue using time wisely, remember to break your project into small segments that can be completed in short amounts of time. By plugging away a little here and there, you will be thrilled with your final product. Keep up the great work as you continue organizing!

Question: Where do you store your children’s clothing? Please add your answer to the comments.

Filed Under: Household, Organizing Tagged With: organizing, children's clothing

Organizing: Children’s Clothing – Part 4 of 5

October 24, 2011 by Tracy

Finished Closet

Have you finished updating your closets with your fall and winter clothing? I am almost completely done. The clothing for my youngest daughter and my son are complete.

Where my daughters receive hand-me-downs from their cousin, my tall son, who is about the same size as his cousin that is 2 years older, does not have an abundance of clothing items. Besides under garments, socks, and tights, my daughters’ closets and dressers are fully stocked.

To keep up with my growing son when hand-me-downs are few, I keep a close eye on sales, especially at the end of each season. In fact, I just ordered my son more clothing items during The Children’s Place sale since his fall/winter wardrobe was quite lean.

Though I am currently working on my oldest daughter’s closet, I have completed these steps for all of my children’s apparel: Step 1 – Prepare, Step 2 – Purge, and Step 3: Pack. The next step I am currently working on is Step 4: Place.

STEP FOUR: Place

Beginning this step with a semi-empty closet and dresser, I located the bin with the appropriate label. For my youngest daughter, I needed the 18-month to 2T winter items. Upon locating the tote, I unpacked the items one at a time, placing them either on a hanger for the closet or in a drawer of her dresser.

Closet

For items in her closet, I organize by color and type of clothing. The bottom rod includes her long-sleeved shirts, overalls and outfits, long-sleeved onesies, turtlenecks, shirts with jackets, and sweaters and sweatshirts. The top rod includes her short-sleeved shirts and dresses.

1. Each of these sections is organized by hanger color:

Bottom Rod:

      • Pink hangers: Long-sleeved shirts
      • Purple hangers: overalls and outfits
      • Pink hangers: long-sleeved onesies
      • Green hangers: turtlenecks
      • Clear hangers: shirts with jackets
      • Pink hangers: sweaters and sweatshirts

Top Rod:

      • Clear hangers: short-sleeved shirts
      • Green hangers: dresses

2. Each of these sections is then organized by clothing color in order of the rainbow:

      • Pinks
      • Reds
      • Oranges
      • Yellows
      • Greens
      • Blues
      • Purples
      • Browns
      • Blacks
      • Whites

Now this type of organization may be too organized for you. For me, having all the clothing in order makes putting laundry away a breeze. The hanger is already in its place, and I just need to play a simple matching game: match the clothing item with its correct hanger.

In using time wisely, this system has served me well. Laundry is not a daunting task because every space is already organized and ready for the items to be replaced. Having a designated place for each item is my best tip for using time wisely.

Dresser

My daughter’s dresser has 6 drawers which I have designated for different items:

      1. Socks, tights, and under garments
      2. Smallest sized clothing, i.e. her 18-month outfits, pants, and pajamas
      3. Largest sized clothing, i.e., her 2T outfits, pants, and pajamas
      4. More space for 2T clothing items
      5. Empty – As she grows out of items, I place them in this drawer. When it is time to repeat this process in the spring, I will have a head start on purging her wardrobe. Having a place for smaller items that is out of sight helps keep her room clutter-free and organized.
      6. Next sized clothing – If I purchase additional items in the next size, I will add these clothes to this drawer.
Shoes

After growing out of her size 4 shoes, I placed the size 5 shoes into her changing table drawer. These shoes were in another tote labeled “girls shoes sizes 1-5.”

Donations

If I find items that I do not love or would not place on my daughter, I add it to the donation pile.

At the end of this fourth step, my daughter’s closet, dresser, and shoe drawer have been filled. Knowing what she has helps me know what items she is missing. Being the second girl in our family with my older daughter’s hand-me-downs, her wardrobe is usually complete, like it was at end of this step. Next week, I will conclude the fifth step in my “organizing my children’s clothing” project. Until then . . . happy organizing!

Question: How do you organize the clothing in your closets? Feel free to post a picture with your answer.

Filed Under: Household, Organizing Tagged With: organizing, children's clothing

Organizing: Children’s Clothing – Part 3 of 5

October 17, 2011 by Tracy

Though this process is definitely taking longer than I would like, I am making progress. After completing Step 1 – preparing to upgrade my daughter’s clothing from the 12-month through 18-month clothing to 2T items, I purged the closet, dresser, coat closet, diaper bag, and car as I finished Step 2 last week. With piles of clothing organized by size, I then proceeded to Step 3.

STEP THREE: Pack

12-month Clothing

After locating the tote with the label “Girls – 12-months – summer clothing,” I added all the short-sleeved and light weight clothing from the 12-month clothing pile. I neatly folded and packed these items to fit as many as possible in one tote.

Any winter clothing for this size was packed in the tote marked “Girls – 12-months – winter clothing.” When the tote was full or all the items packed, I placed the lid back on the tote and return it to the hallway for storage.

18-month Clothing

When the tote holding the 12-month winter clothing still had room for more items, I added the 18-month winter items and changed the label. Now the girls’ winter clothing includes 12-18-month sizes.

All the 18-month summer clothing was packed into totes labeled “Girls – 18-months – summer clothing.”

Shoes

All her shoes are kept in the drawer of her changing table. While I was packing away the clothing items, I placed her size 4 shoes in plastic bags, labeled them “size 4,” and placed them in the tote labeled “Girls shoes sizes 1-5.”

Donations

The pile of clothing that had not been worn was packed into plastic bags to be given to a little girl younger than my daughter to use. With a mound of clothing bags, I rid our home of excess clutter while blessing another family.

Having packed the 12-month and 18-month summer clothing, the 12-month winter clothing, shoes, and donation items, I now have a bare closet, dresser, and room in which to work as I continue to Step 4. The steps help me break the project into manageable sections.

I may not have 2 hours to hide in her room to work, but I can usually find 15-20-minute increments to get a step or two complete. By doing the next thing and following the sequential steps, I can complete the project while using time wisely.

Question: How do you label your children’s clothing? I would love to hear how your system differs from mine. Please share your ideas in the comments.

Filed Under: Household, Organizing Tagged With: clothing, organizing

Organizing: Children’s Clothing – Part 1 of 5

October 3, 2011 by Tracy

It’s official. My kids have grown. As I went to my daughter’s closet for a long-sleeved outfit, I found one dress that was long enough for her to wear to church this morning. Besides sending up a red flag that it is time to reorganize my kids’ clothes, the smaller clothes reminded me that my little ones are growing up.

Though I cannot keep them little, I can add larger clothing for them to wear. In keeping my children’s clothes organized, I have a developed a system that works for us. My process occurs in 5-steps:

Step One: Prepare – gather all the supplies

Step Two: Purge – unload out-grown clothing from closets and dressers

Step Three: Pack – put folded clothes insides totes

Step Four: Place – unpack larger sized clothing into closets and dressers

Step Five: Preserve – place all the totes in storage

As I work through my process, I will take you along with me. In the first step, I need to gather my supplies.

STEP ONE: Prepare

Gather from Storage

All our children’s clothes are stored in large totes in our upstairs storage closets. To help me, my fabulous hubby brought out the clothing totes and placed them in our upstairs hallway.

Place clothes near bedrooms

Having the totes near their bedrooms helps me in using time wisely. I can unload and reload without wasting energy or time in transporting the clothes to another room.

Place shoes in bonus room

Paul continued to help by bringing the totes of shoes into our bonus room. Besides keeping them separated from the clothes, my girls enjoy playing with the shoes. (It is amazing how both of my daughters love shoes. My son could care less. :-))

Stack labeled storage totes

Having all the totes labeled with “girls or boys,” “clothes or shoes,” “winter or summer,” and the “size,” I can easily find the totes needed for each child.

For my youngest daughter, I will need totes from 12 months to 2T. I will be putting away her 12 month to 2T summer clothes and getting out her 18 month – 2T winter clothing.

With all the totes gathered from our storage area, I am ready to start Step Two: purge. Next week, I will bring you along on my journey as I purge my children’s closets and dressers of summer clothing and articles that are now too small. In using time wisely, I will soon have more than one option for my daughter’s Sunday wardrobe. Happy organizing!

Question: What type of storage system do you use for clothing? Please add your answer to the comments.

Filed Under: Household, Organizing Tagged With: organizing, clothing

Organizing: Garage Cabinet

September 5, 2011 by Tracy

Photograph Credit: Target

My garage is the dumping area for items to be donated, seldom used items, and the extension of my pantry. I also happen to park one of our vehicles in our 2-car garage, keep tools, lawn equipments, and our freezer.

To return the garage to an organized state, my husband cleans out the garage about every 6 months. This project involves taking everything but the shelving out of the garage, sweeping it out, and replacing similar items together. Every time the garage gets cleaned, we have more space and more items to trash, donate, and sell.

Before my husband cleaned the garage this summer, I decided to organize the large cabinet in the garage that holds items I use periodically. On the day of this project, I prepared to work.

Preparing to Organize

1. Opened the garage door

2. Backed out the car

3. Brought out all the bicycles and outdoor toys for the kids to play

4. Assisted my children in play

5. Set up a card table for my workspace

Organizing the 5-shelf Cabinet

With the children playing, I began working from top to bottom.

1. Took all items off shelf #1

    • Sent trash to the garbage can
    • Placed donated items in cardboard box
    • Added items for garage sale to designated box
    • Items to keep where placed on the card table in piles of similar items

2. Dusted shelf

3. Replaced items back onto shelf

4. Repeated steps 1-3 with shelf #2

5. Repeated steps 1-3 with shelf #3

Took a break to refill drinks, assist with bikes, and play with my children

6. Repeated steps 1-3 with shelf #4

Received help and advice from oldest daughter on my progress 🙂

7. Repeated steps 1-3 with shelf #5

Completing the Project

1. Placed all trash in the garbage can

2. Put the donated items box in the car for drop off

3. Slid garage sale items to the left side of the garage with the other garage sale items

4. Returned card table to the closet inside the house

5. Put away the bikes and outdoor toys

6. Ushered children inside the house

7. Pulled the car into the garage

8. Closed the garage door

Project complete!

My garage cabinet was transformed from “stashing items wherever I found space” to clean, neat shelves that hold items for easy access. In using time wisely, I decluttered my garage cabinet resulting in no more trash (or broken items), more items to sell at a garage sale, and similar items placed together for easy retrieval. I also found a nice bake ware set, that I forgot I had, which has been a nice addition to my kitchen. This organizational project was worth my time and energy!

Question: What organizational projects are you plugging through that is worth your time and energy? Please add your answer to the comments!

Filed Under: Household, Organizing Tagged With: organizing

« Previous Page

Welcome to Using Time Wisely!


Presenting organizational tips and tricks to save you money, energy, and time.

To access 5 Ways to Using Time Wisely Today, click "like" on my facebook page and join in on the journey of Using Time Wisely.

Looking for something?

Email Newsletter

Sign up to receive email updates and to hear what's going on with us!

Copyright © 2026 · Lifestyle Pro Theme on Genesis Framework · WordPress · Log in