• Home
  • About Tracy
  • Contact Me

Using Time Wisely

Organized to save money, energy, and time

  • Email
  • Facebook
  • Pinterest
  • RSS
  • Twitter
  • YouTube
  • Document Organization
    • Overview
    • Box 1
      • Credit Report/Cards
        • Credit Reports
          • Credit Updates
          • Credit Scores
        • Credit Cards
      • Personal
      • Home Ownership
      • Vehicles
    • Box 2
      • Life Insurance
      • Major Medical
      • Tax-Favored Programs
      • Prescriptions
      • Dental & Vision
      • Special Health Policies
      • Short-term Disability
      • Long-term Disability
      • Personal Insurance
    • Box 3
      • Social Security Documents
      • Retirement
      • Investments
      • Estate Planning
      • Tax Records
  • Household
    • Cleaning
    • Maintaining
    • Organizing
    • Scheduling
      • Laundry
  • Event Planning
    • Assisting
    • Attending
    • Coordinating
      • Birthday Party
      • Christmas
      • Dinner Party
      • Fall Festival
      • Field Trip
      • Lemonade Stand
      • Thanksgiving
    • Learning
    • Preparing
    • Serving
  • Miscellaneous
    • Communication
      • Customer Service
      • E-mail
      • RSS Feed Reader
    • Goals
    • Organization
    • Time Management
      • To Do List
  • Food
    • Food Prep
    • Grocery Shopping
      • Lists
      • Pricing
    • Menu Planning
    • Recipes
    • Stockpile
  • Family Activities
    • Going Out
      • Free Outings
      • Inexpensive Outings
      • Summer
    • Rewards
      • Good Grades
      • Reading
      • Summer Reading
    • Staying at Home
  • Stretching Your Dollars
    • Daily Deals
      • Groupon
      • LivingSocial
    • Drugstores
      • CVS
    • Gas Prices
    • Gifts
    • On-line Shopping
    • Pictures
    • Products
    • Restaurants
    • School Items
    • Tips
You are here: Home / Archives for Top 10 List

2012 Year-in-Review Top 10 List Countdown: Post #6

December 26, 2012 by Tracy

Organizing: Kitchen Drawers – Part 2 of 2

Originally posted by Tracy on January 2, 2012

Guess I left you hanging on my kitchen drawer organization project. Sorry about that.:-(Since some of my favorite posts did not make the Top 10 List of 2011, I chose to include a preview day which trumped this second posting of this short series.

Though you had my steps to get from chaos to order, I know you are waiting for the before and after pictures. Yes, my house is lived in, gets dirty and disorderly, but it gets cleaned and organized.

If you are dealing with out-of-control clutter, then take it one room at a time. Work a little each week on one section of that room. Your progress might be slow, but don’t give up or get distracted. Just concentrate on brightening that corner. You will gain momentum as you make progress. Just carve out 15 minutes a week and go.

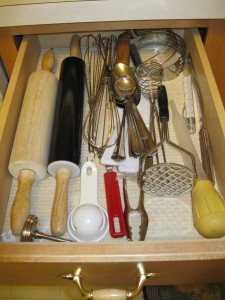
Drawer #3

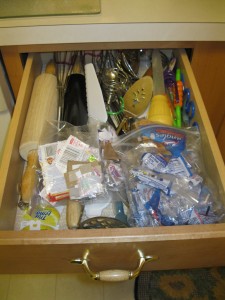
On the day I organized drawers 1 and 2, I also cleaned out drawers 3 and 4. This third drawer houses utensils that are necessary, but not used daily.

Top 10 List   

Before Organizing                                  After Organizing

As the resident “junk” drawer with Box Top labels, Kraft Singles wrappers, and other small miscellaneous items, I began whipping this drawer into shape by:

1. Pulling out all the utensils and putting them on the counter

2. Sorting the items into piles

3. Wiping out the drawer

4. Replacing the drawer liner

5. Placing similar items together in the drawer

6. Giving each utensil a home

7. Putting away the remaining items that did not belong in this drawer

8. Examining the organized and now clutter-free kitchen drawer

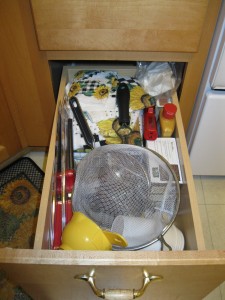
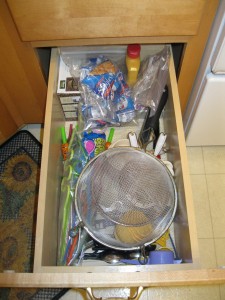
Drawer #4

This drawer is in a row of three drawers. The first two drawers were clean, organized, and working well. However, this bottom drawer was crammed full and needed decluttering.


Before Organizing                            After Organizing

Once again I followed the above eight steps and removed lots of excess and unused items from this drawer.  When I replaced the needed items back in the drawer, I was left with room for all the straws, Box Tops labels, and Kraft Singles wrappers. :-)

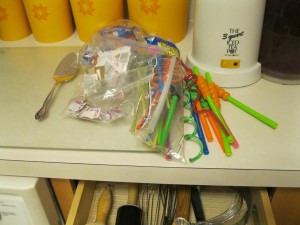
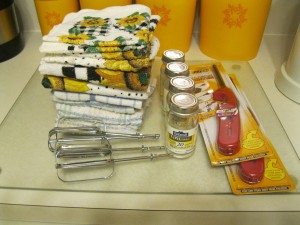
Leftover Items from Drawer #3 for Drawer #4

The rest of the items were donated, trashed, or put away, i.e., the extra hand towels placed with the linens in my half bathroom downstairs.

Leftover items from Drawer #4

When all the extra items from these drawers were removed and the remaining items neatly organized in the drawers, I could easily find the utensil needed. No longer did I need to sift through the cutter. As I spent less than an hour to organize these four drawers, I rid our home of clutter while using time wisely. Now, I am ready to tackle more clutter in my home. Welcome January and 2012!

Question: What household organizational project are you choosing to start this week? Please add your answer to the comments.
Filed Under: Year-in-Review, Uncategorized Tagged With: Top 10 List

2012 Year-in-Review Top 10 List Countdown: Post #7

December 25, 2012 by Tracy

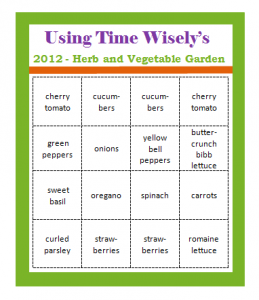
2012: Garden Journal – September Edition

Originally posted by Tracy on September 20, 2012

Top 10 ListMy garden missed me while I was on vacation because it was a wild mess when we returned. I had some help, but I lost some plants. Oh well, it was toward the end of the season, and I am learning.

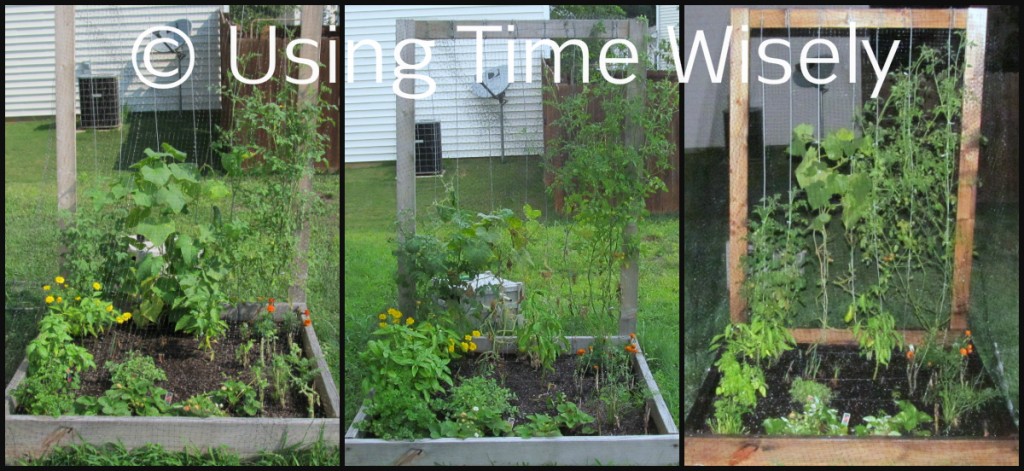
With our garden thriving at the end of July and off for a couple of weeks, our garden produced and looked like this at the end of August:

Strawberries

Our 4 plants produced 27 strawberries during the heat of August. Though we did not munch on half of them, we blessed our neighbors as they harvested our garden while we were on vacation.

The bugs and/or birds are still eating our fruit. Some of our strawberries have chunks missing, but the net is still in place. I haven’t found anything eating at the plant, but something is enjoying our sweet fruit.

Tomatoes

With 40 ripe cherry tomatoes, our plants continue to produce. Currently, the plants are covered with green tomatoes just waiting to ripen.

In pruning our plants, I knocked off over 50 green tomatoes as I unstuck the vines from the net. It was amazing how overgrown the garden got during our time away.

Garden - September 2012

Cucumbers

Something is harming my cucumber plants. The leaves are wilting, so I’m not sure if it is a bug or just the heat. In spite of the setback, our two plants yielded 11 cucumbers.

Of all the items growing in our garden, the cucumbers are my favorite. They continue to amaze me!

Lettuce

Oops! My pruning in August resulted in killing all my lettuce plants. I am assuming it was my pruning – though I understand that lettuce does not like heat. Well, the temperatures soared above 100 degrees here in South Carolina, so it could have been a combination of the heat and my pruning. I’ll learn from this mistake for next year.

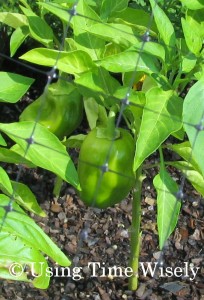
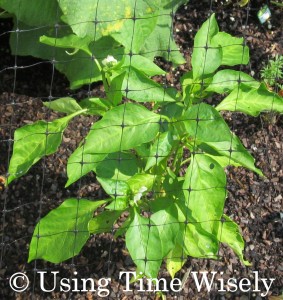
Peppers

Harvested the two green bell peppers, but one was almost red.

Garden - September 2012

Our yellow pepper plant has little tiny buds, so maybe we’ll see one this season. In our area, the peppers are taking longer than usual to produce.

Garden - September 2012

Carrots

Sprouting lots of green stalks above the ground, our carrots are growing.

Garden - September 2012

Onions

More green shoots have emerged from our onions. Yeah, they are growing well.

Herbs

After snipping more parsley, basil, and oregano, I dried and stored these herbs for gifts and use this fall. These herbs just keep on growing, so I keep on drying.

Beginning, middle, and end of August 2012

August 1                          August 20                    August 20

Our garden missed us while away on vacation, and I missed tending and caring for these fruits and vegetables. Though it hit its peak in July/August, I look forward to extending its season into the fall.

In using time wisely, our garden has provided extra fruits and vegetables, hours of activity, subjects of conversations, and lessons learned. Enjoying our gardening experiment, I encourage you to garden. You might not get it right the first time, but it’s okay. I’m not 100% successful either, but the results are worth the investment. Happy experimenting!

Question: Are you planting a fall garden? If so, what are you planting?

Filed Under: Year-in-Review, Uncategorized Tagged With: Top 10 List

2012 Year-in-Review Top 10 List Countdown: Post #8

December 24, 2012 by Tracy

Blue’s Clues Birthday Party – Part 3 of 3

Originally posted by Tracy on April 24, 2012

Top 10 listThough I plan each birthday party, I know that there will be changes. I never know how my children will react on the day of the party. Sometimes they are all in and ready to play everything while other times they do not want the attention focused on them.

Having learned from past birthday parties, I try to have a backup plan or at least another option for those moments.

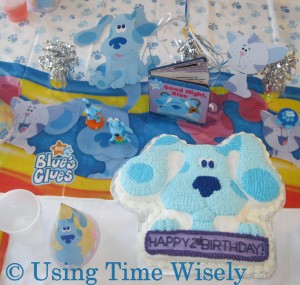
For my toddler’s Blue’s Clues party, we chose a theme and planned an itinerary. On the day of the party, we carried out our plan. I enjoyed the process as my toddler allowed Daddy, grandparents, and siblings to help her. Though the party was not perfectly executed, a bit of spontaneity kept everyone on their toes. ;-)

Welcome

Since my toddler cannot turn the door knob on our front door, my son and older daughter opened the door when the guests arrive. My toddler remained down the hall waiting for her guests to come see her.

Games – Part 1 of 3

Blue’s Clues

After our guests arrived and had a few minutes to play, we began the game of Blue’s Clues. For our party, Blue was looking forward to something at this birthday party, and she left 3 clues to help us figure out Blue’s Clues.

The 6 children then began searching for Blue’s Clues. (We hid one clue at a time to avoid finding them out of order. During setup, Paul placed the first clue. Though I could have cut the clues out of paper, I just used the clues from her Halloween outfit since they were nice and big.)

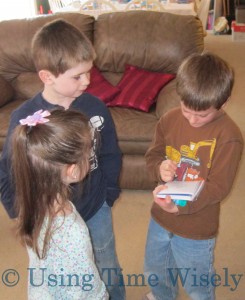
The birthday girl found the first clue on the living room ceiling fan. It was really cute. The older children took turns drawing the clue in our handy-dandy notebook.

Clue 1

 Hide and Seek Blue

During setup, I hid 6 Blue’s Clues items (2 figurines, 2 stuffed animals, and 2 bath mitts). With the 6 children paired up, the two 6-year-olds searched for the figurines while the two 4-year-olds and two 2-year-olds looked for the stuffed animals and bath mitts. Each child found one item. How cute it was to watch the older ones help the younger ones after finding their own.

Lunch

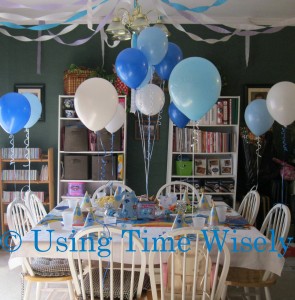
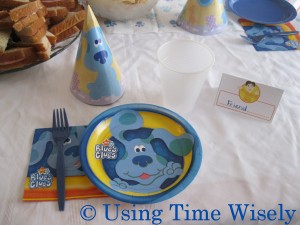
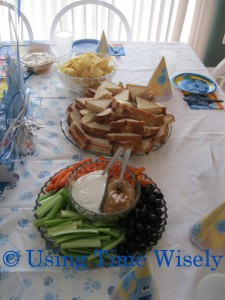
With our party beginning at 10:00 a.m. and the younger children used to eating lunch around 11:00 a.m., I tried to keep them on schedule. The children found their seats at the table, set with tableware, silverware, and place cards, while the parents served the food.


While the children ate at the table, the adults filled their plates and ate in the living room.

Games – Part 2 of 3

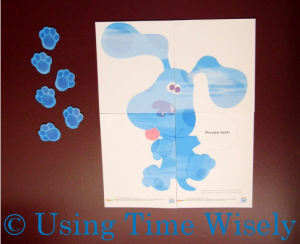
Pin the Paw on Blue

After lunch, we played the Blue’s Clues version of Pin the Tail on the Donkey. The older children were blind folded, but the younger ones just closed their eyes or placed the paw on Blue. ;-)


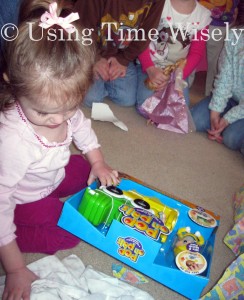
Open Presents

The children all sat on the living room floor and waited for the birthday girl to open her gifts. Sometimes opening the presents is the hardest part with keeping the children back to removing the toys from the packaging to the commotion.

However, this gift opening session went very well. While the grandpas removed the toys from their packaging, we continued with our games.

Games – Part 3 of 3

Blue’s Clues

During lunch, I placed the second paw print on my daughter’s portrait. When the participants found it, we drew the clue into our handy-dandy notebook.

While drawing the second clue, Paul placed the third clue on a candle. The guests quickly found the third clue, added it to our handy-dandy notebook, and deciphered Blue’s Clues. Blue was ready for the birthday girl to blow out her candle.

Sing, Blow Candle, and Cake

After singing, my daughter blew out her candle (with help), and we served cake at the table with the children sitting in their lunch seating arrangement.


Thank you and Goody Bags

As the children finished their dessert, they went to play. My daughter then distributed the goody bags, made from brown paper bags with a paw print and a guest’s name on the front. The goodies included: blowouts, straws, flying disks, jewelry (girls) and action figures (boys).

 Play with new toys and goody bag items

The participants finished the party by checking out the new toys and their goody bags. Throughout that morning,  they enjoyed playing with each other while celebrating my daughter’s second birthday.

With an itinerary in place, I followed the plan to keep the party moving and to remind myself when to hide the clues and what activity to complete next. The party was fun for all and wore out our toddler. Upon telling her friends goodbye, she got her blanket and crawled upstairs. She was ready for her nap. :-)

When planning birthday parties, I consider the theme, plan an itinerary, and enjoy the execution. Happy planning!

Question: Does your child like or avoid the attention at his/her birthday party?

Filed Under: Year-in-Review, Uncategorized Tagged With: Top 10 List

2012 Year-in-Review Top 10 List Countdown: Post #9

December 23, 2012 by Tracy

Spring Cleaning: Removing Black Marks from a White Kitchen Sink

Originally posted by Tracy on April 9, 2012

Top 10 ListSpring has sprung! With new organized spaces after completing Project Simplify Week 1, Week 2,Week 3, and Week 4, I need to clean some key areas of my home.

Welcoming the cool breeze by opening our windows, I get motivated to spring clean. During this time, I like concentrating on specific areas that get used often, but not cleaned often enough. The first area needing some tender loving care elbow grease is my kitchen sink.

Kitchen Sink Marks

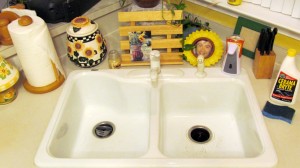
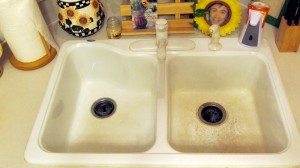
Our sink is white and shows all the dirt, grime, and metal marks from pots and pans rubbing on the white finish. Removing black marks from a white kitchen sink is easy when you know how to clean it.

Finding a Cleaning Solution

When we first moved into our home, I remember the first mark on the sink. I scrubbed with soap and water to no avail. I then tried a spray-on cleaner, like Fantastic, which only cleaned the surface and left the mark.

Without finding a quick solution, I turned to my computer to search for an answer. Surprised to find no help, I looked to the manufacturer and home improvement stores.

Removing black marks

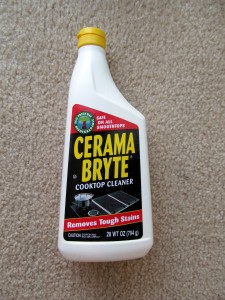
Finally, I discovered that the gentle cleaner for our smooth-top stove removes these marks. Yeah!

A few years later, our sink drain backed up, and Paul treated the clog with Drano. The Drano completely removed all those stubborn marks without any effort on my part.

Though the Drano worked, the fumes were strong, so I choose to clean with the smooth-top stove cleaner (any brand will do).

Cleaning our White Kitchen Sink

1. Drizzle the cleaner inside both sides

2. Use a no-scratch sponge to wipe the sides and bottom

3. Rinse with lukewarm water

4. Repeat for any stubborn marks


Before         and           After

Much better! My sink definitely needed to be clean. With just a few minutes, you can spring clean, too. Within 10 minutes I had my kitchen sink sparkling white. Knowing I accomplished this task today motivates me to choose another small task to improve our home while using time wisely. Happy spring cleaning!

Question: What item are you spring cleaning this week?

Filed Under: Year-in-Review, Uncategorized Tagged With: Top 10 List

2012 Year-in-Review Top 10 List Countdown: Post #10

December 22, 2012 by Tracy

2012 Quick Tip Week: Butter Bread Before Toasting

Originally posted by Tracy on May 10, 2012

Top 10 list

Photograph Credit: Microsoft Images

Our week of quick tips is over halfway complete.

If you missed any of the four quick tips from this week, you can click on these links:

#1 – Designated space for “to be filed” paperwork,

#2 – Use disinfecting wipes for quick cleanings,

#3 – Keep your brainstorming notes, and

#4 – Power off your phone.

The fifth tip comes from my children’s food preferences.

Quick Tip #5: Butter Bread before Toasting

In teaching my children to eat the entire slice of bread, including the crust, I have learned to keep the crust soft.

When bread gets toasted, the hard crust makes eating difficult. With their little mouths, my children enjoy soft bread with melted butter.

To keep the crust soft and still get a light toast to the bread, I butter the bread before toasting in my toaster oven. The butter keeps the entire slice of bread soft, and my children willingly eat the entire piece of bread.

This little tip helps to save our family money since my children are receiving the nutrients from the entire slice of bread without wasting food.

In using time wisely, I butter bread before toasting. By eating the entire slice, my children do not need extra slices which saves me money, energy, and time.

As you feed your picky children, who do not like the hard crust on toast, butter bread before toasting. If your children are like mine, then they may eat the entire slice which will save you money, energy, and time. Happy savings!

Question: Do your children eat the entire slice of toast?

Filed Under: Year-in-Review, Uncategorized Tagged With: Top 10 List

« Previous Page
Next Page »

Welcome to Using Time Wisely!


Presenting organizational tips and tricks to save you money, energy, and time.

To access 5 Ways to Using Time Wisely Today, click "like" on my facebook page and join in on the journey of Using Time Wisely.

Looking for something?

Email Newsletter

Sign up to receive email updates and to hear what's going on with us!

Copyright © 2025 · Lifestyle Pro Theme on Genesis Framework · WordPress · Log in